(Updated September 15, 2025) In October 2019 I was fortunate enough to present at the Audio Engineering Society’s annual convention in New York City on the legacy of recording engineer Rudy Van Gelder. Shortly after I gave my talk, a former mastering engineer named Bill Pauluh reached out to me via email. He had seen my blog and was eager to share lots of helpful information with me about Rudy, his equipment, and his methods.
This was the beginning of both a friendship and mentorship. In 2023 I visited Bill’s Glastonbury, Connecticut home. During my visit, he turned my attention to the old-fashioned console in the corner of the living room, which I would soon learn was a Pilot model PT-1030D completely and beautifully restored by Bill with the help of a woodworking friend. After disappearing from the living room for a moment, he returned with a Hank Mobley Blue Note ten-inch. He opened the lid of the console to reveal a gorgeous all-chocolate Garrard RC-88 record changer and controls for the console’s tube amplifier. When he dropped the needle, I was awestruck by how “right” jazz from the 1950s sounded through a vintage mono system like this.
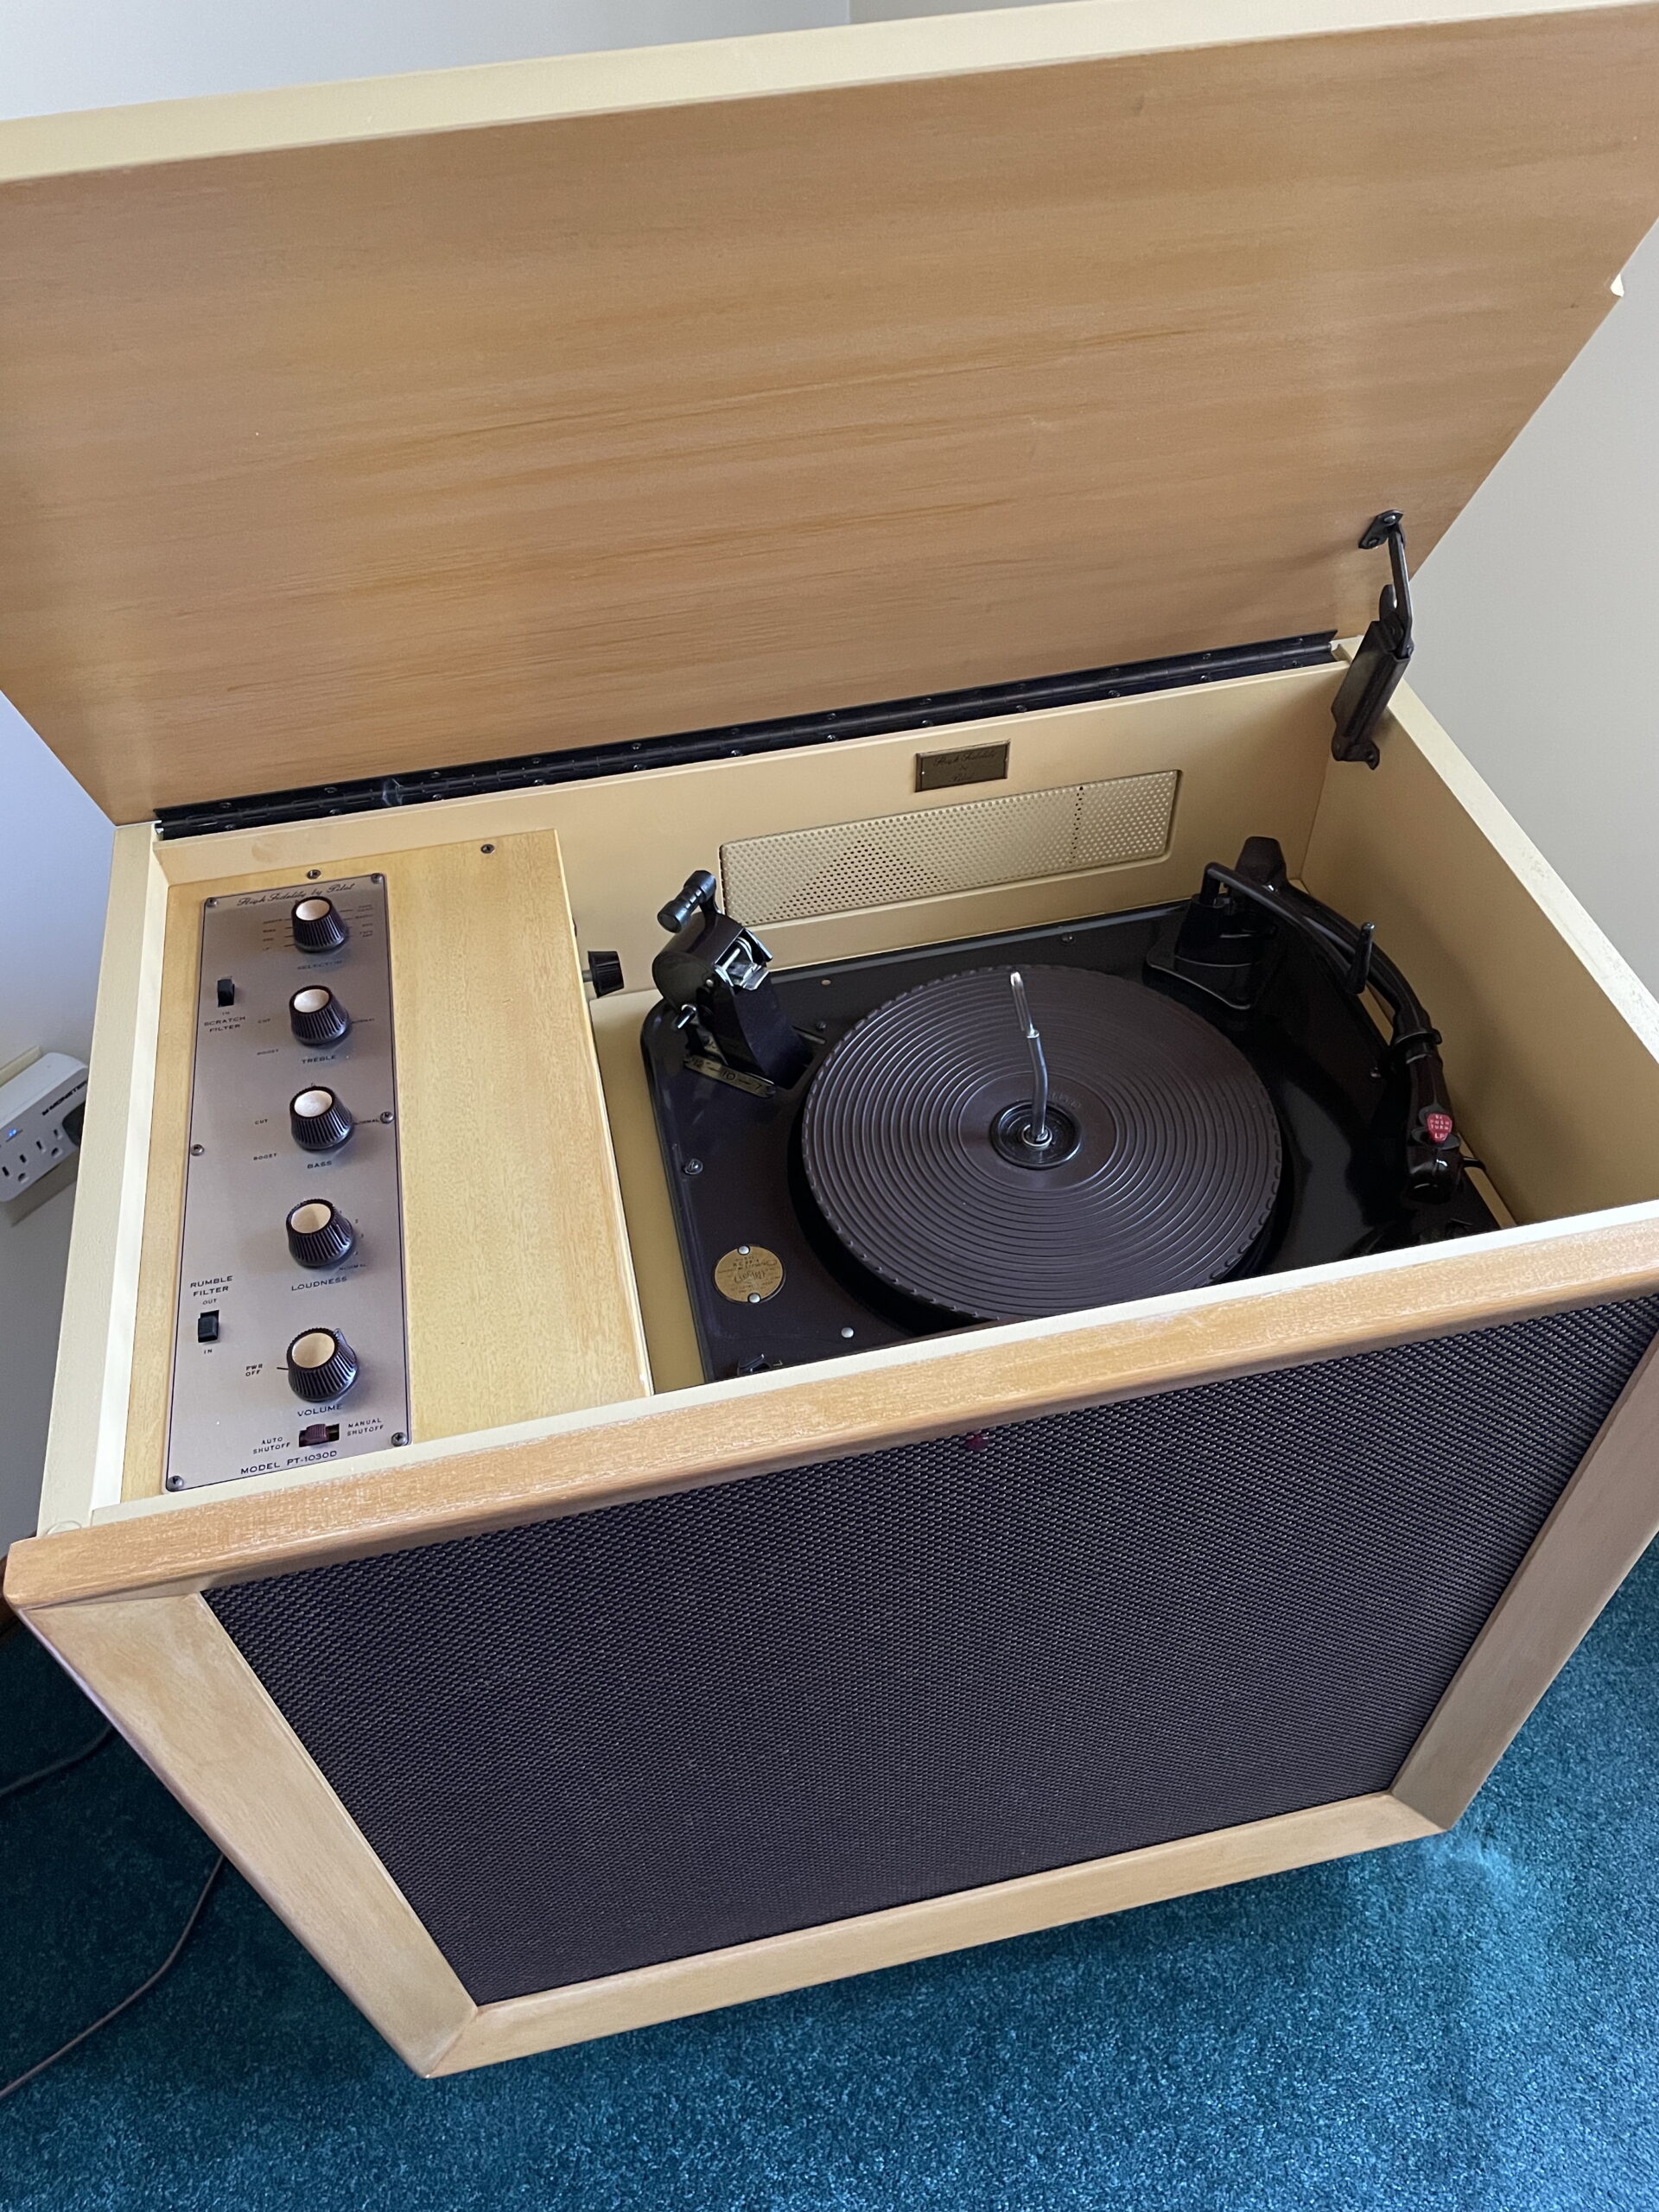 |
| Bill Pauluh’s fully restored Pilot PT-1030D hi-fi console circa 1957 |
Bill explained that Pilot and also Fisher made the best small-form, all-mono consoles in the 1950s. Since then (and in addition to occasionally badgering Bill to sell me one of his Pilots), I have casually looked for a similar console online. I would sporadically send links to Bill, seeking his approval, and would always get turned down: poor condition, too far away, too expensive, etc. Finally, this past June, a beautiful Fisher Model 51 “Consolette” in working condition with “provincial” fruitwood finish popped up in my eBay feed. It was located in Mansfield, Ohio, an eight hour drive from Albany, New York — far, but not impossible. The seller was asking a meager $250 for it. After sending the link to Bill, and to my surprise, he gave his approval and agreed to help me restore it. I got the seller on the phone the next day. We agreed to an in-person cash price of $200 and made plans for me to pick it up the following week.
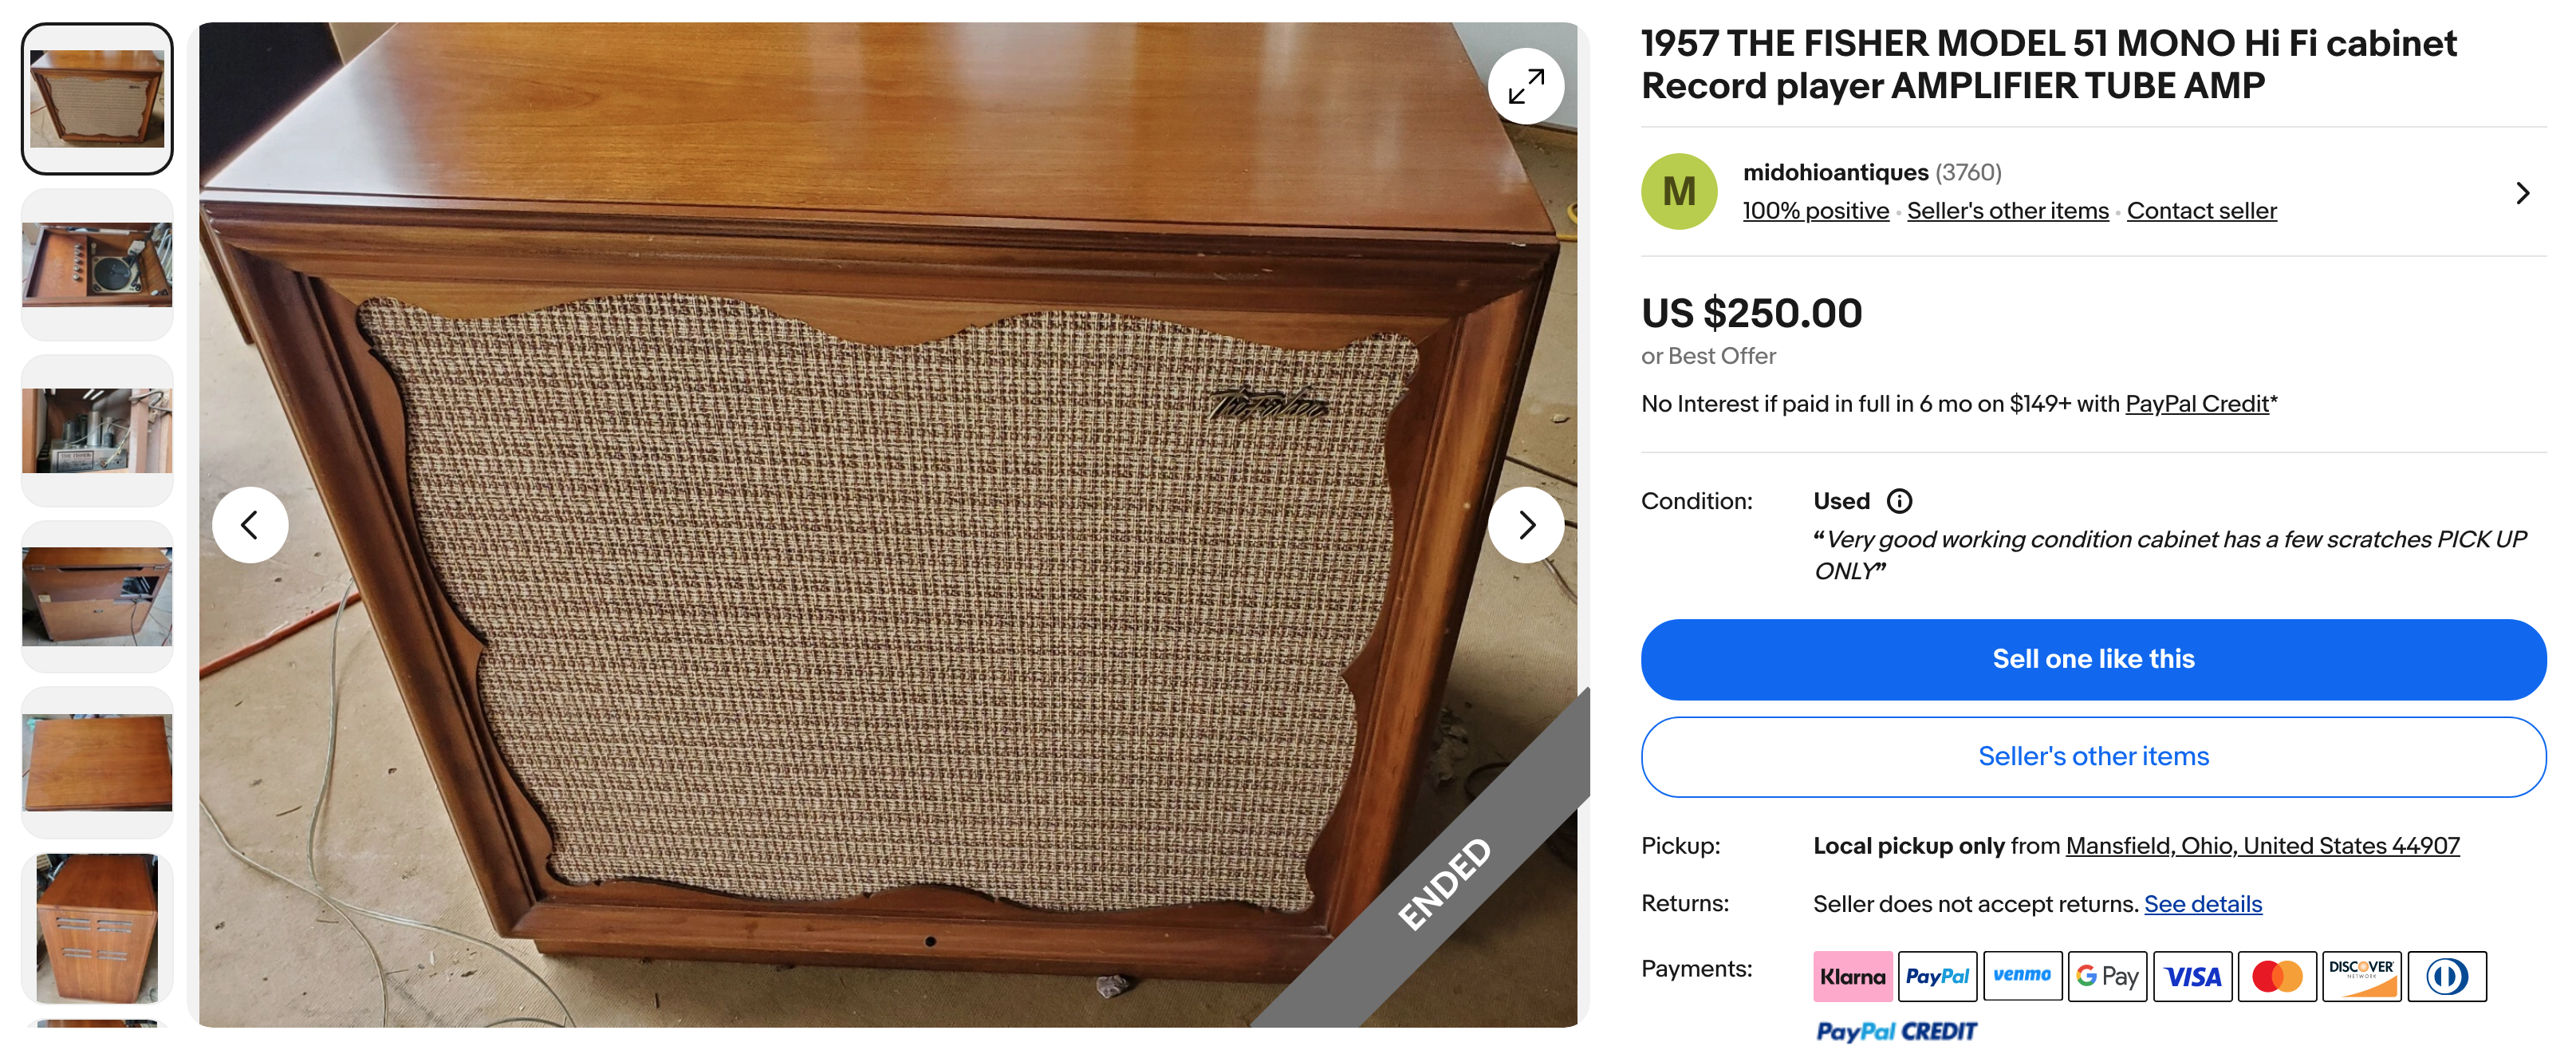 |
| Original eBay listing for my console |
I was prompted to revisit the console option recently after hearing a vintage General Electric VRII mono cartridge at a record shop in Japan. This set the gears in motion for me to consider the possibilities creating a true mono listening setup.
Definitions of “true mono” rightfully vary between enthusiasts. Some might be satisfied with simply summing the channels of a stereo cartridge (I was and in many ways still am). Others might require a contemporary mono cartridge with vertical compliance and architecture realigned to only respond to lateral motions of the stylus. Others might take it a step further, requiring that the cartridge have a stiffer cantilever with low vertical compliance, and perhaps a conical stylus with a 1-mil radius.
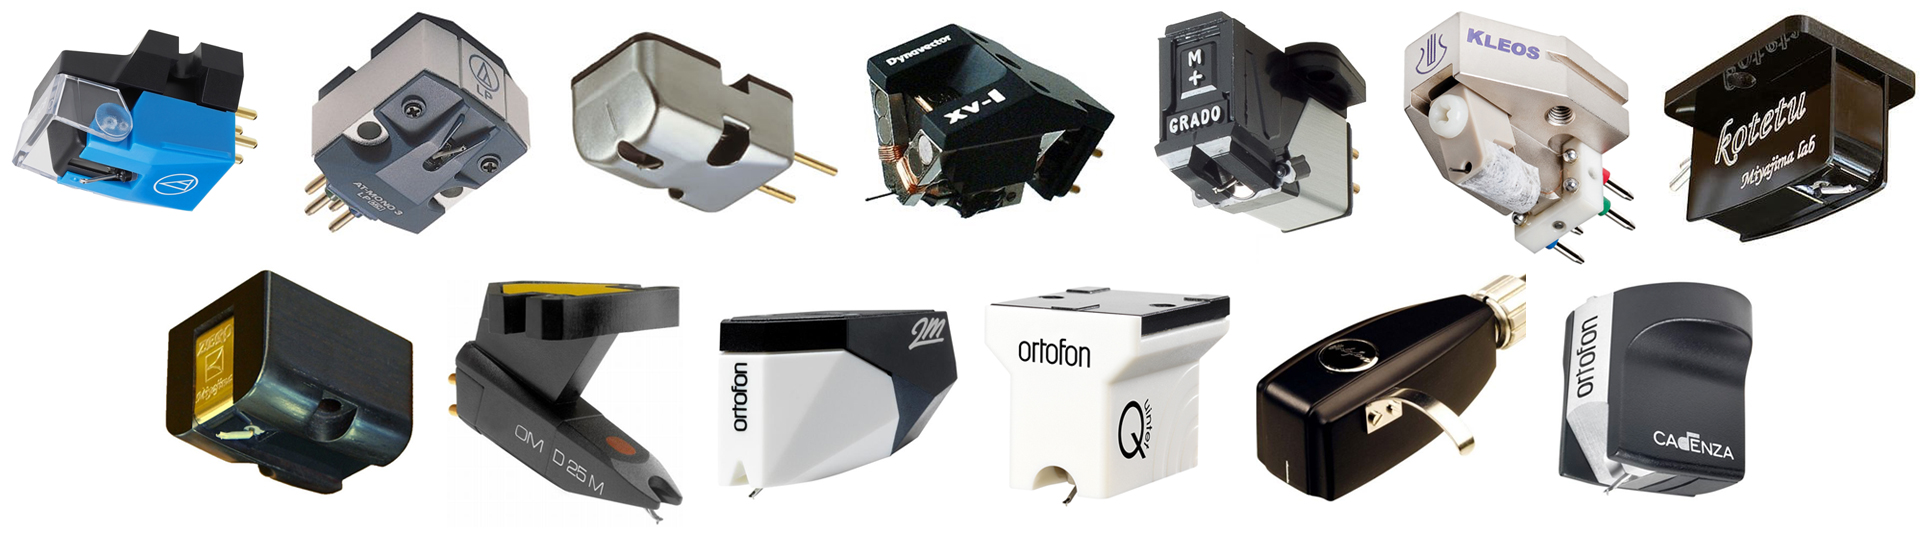 |
| Various modern mono carts for sale today |
Finally, we arrive at what is arguably the most “mono” option imaginable: a system that is truly single-channel through and through, from the stylus all the way to the speaker. A system like this would include: a vintage two-pin mono cartridge with no vertical compliance, a vintage turntable with a tonearm wired for mono, a vintage mono phono stage, a mono power amplifier, and a single speaker source for the sound to radiate from.
The prospect of a vintage mono console would instantly tick all of these boxes. The Fisher Model 51, which originally retailed for $279.50 (about $3,250.00 in 2025), was produced and sold from 1957 into 1958. This was right in the heart of the golden age of audio, which featured monophonic recording and reproduction equipment by necessity. It was also a golden age for the hard bop era in jazz, and nearly all jazz LPs released prior to the introduction of the Model 51 were made with the intention of being played back on a mono system.
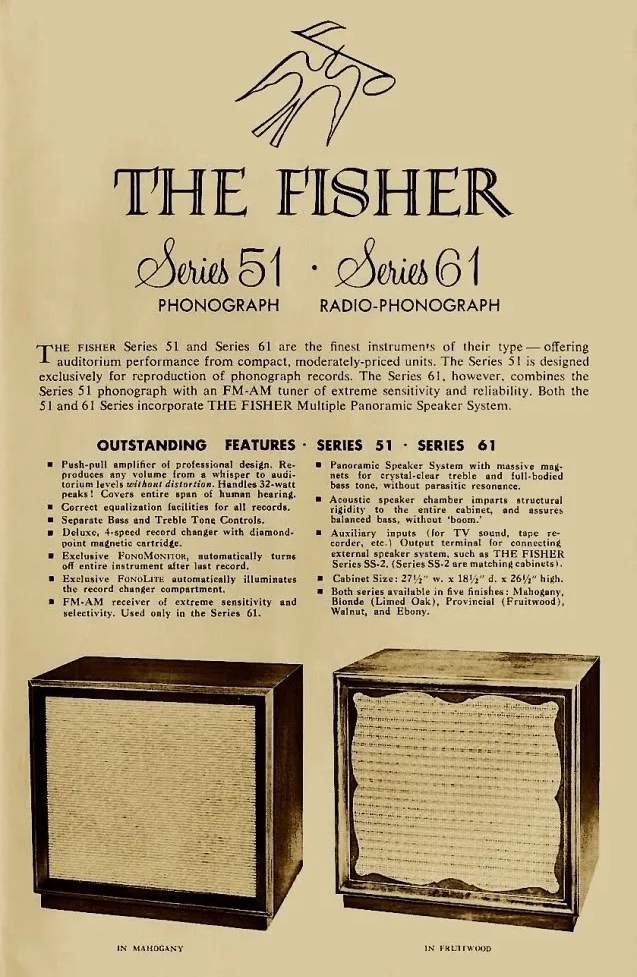 |
| 1957 ad for Fisher 51 and 61 Consolettes (the 61 added a tuner) |
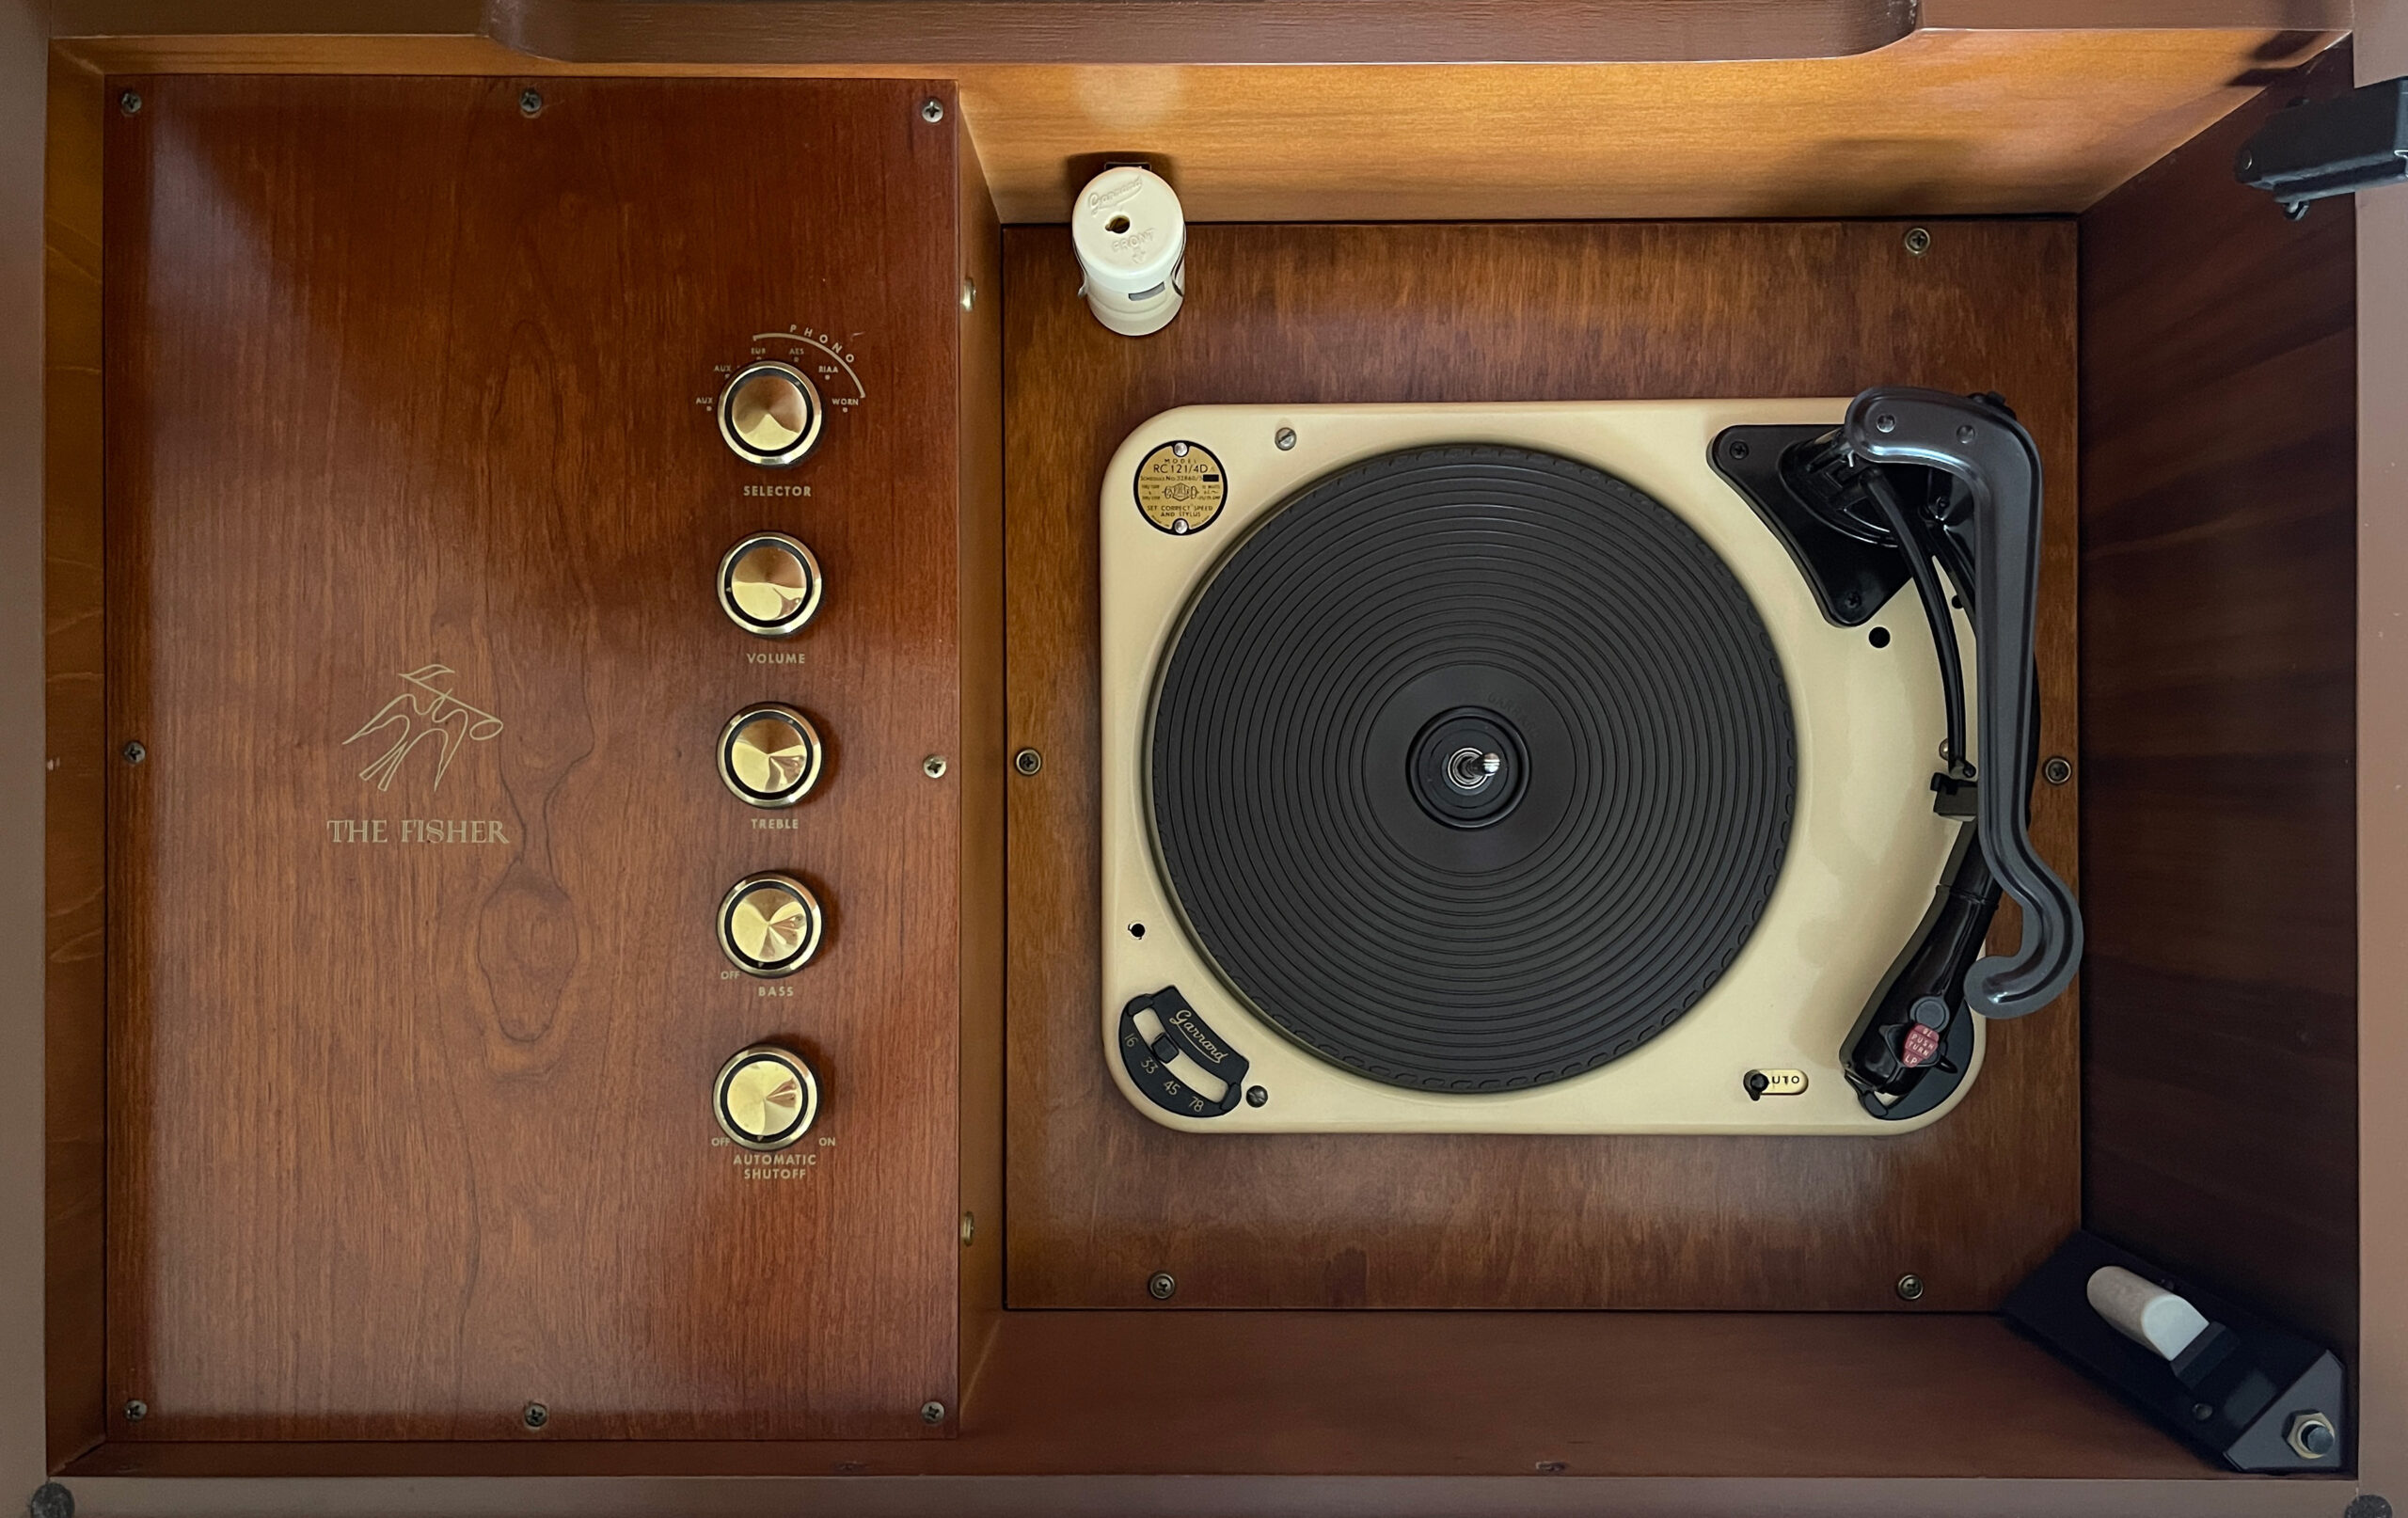
The most popular choice of “magnetic pickup” in 1957 was the aforementioned GE “variable reluctance” VRII. It broke new ground by being the first affordable, mass-produced option boasting a tracking force as low as four grams. All Fisher consoles came with a “triple play” VRII stock-mounted, which allowed the user to easily alternate between a 1-mil conical stylus for playback of microgroove LPs and 45s, and a 3-mil stylus for playing standard groove 78s. For the Model 51, this was achieved by pressing and turning a protruding switch atop the chunky headshell of a Garrard RC-121/4D record changer.
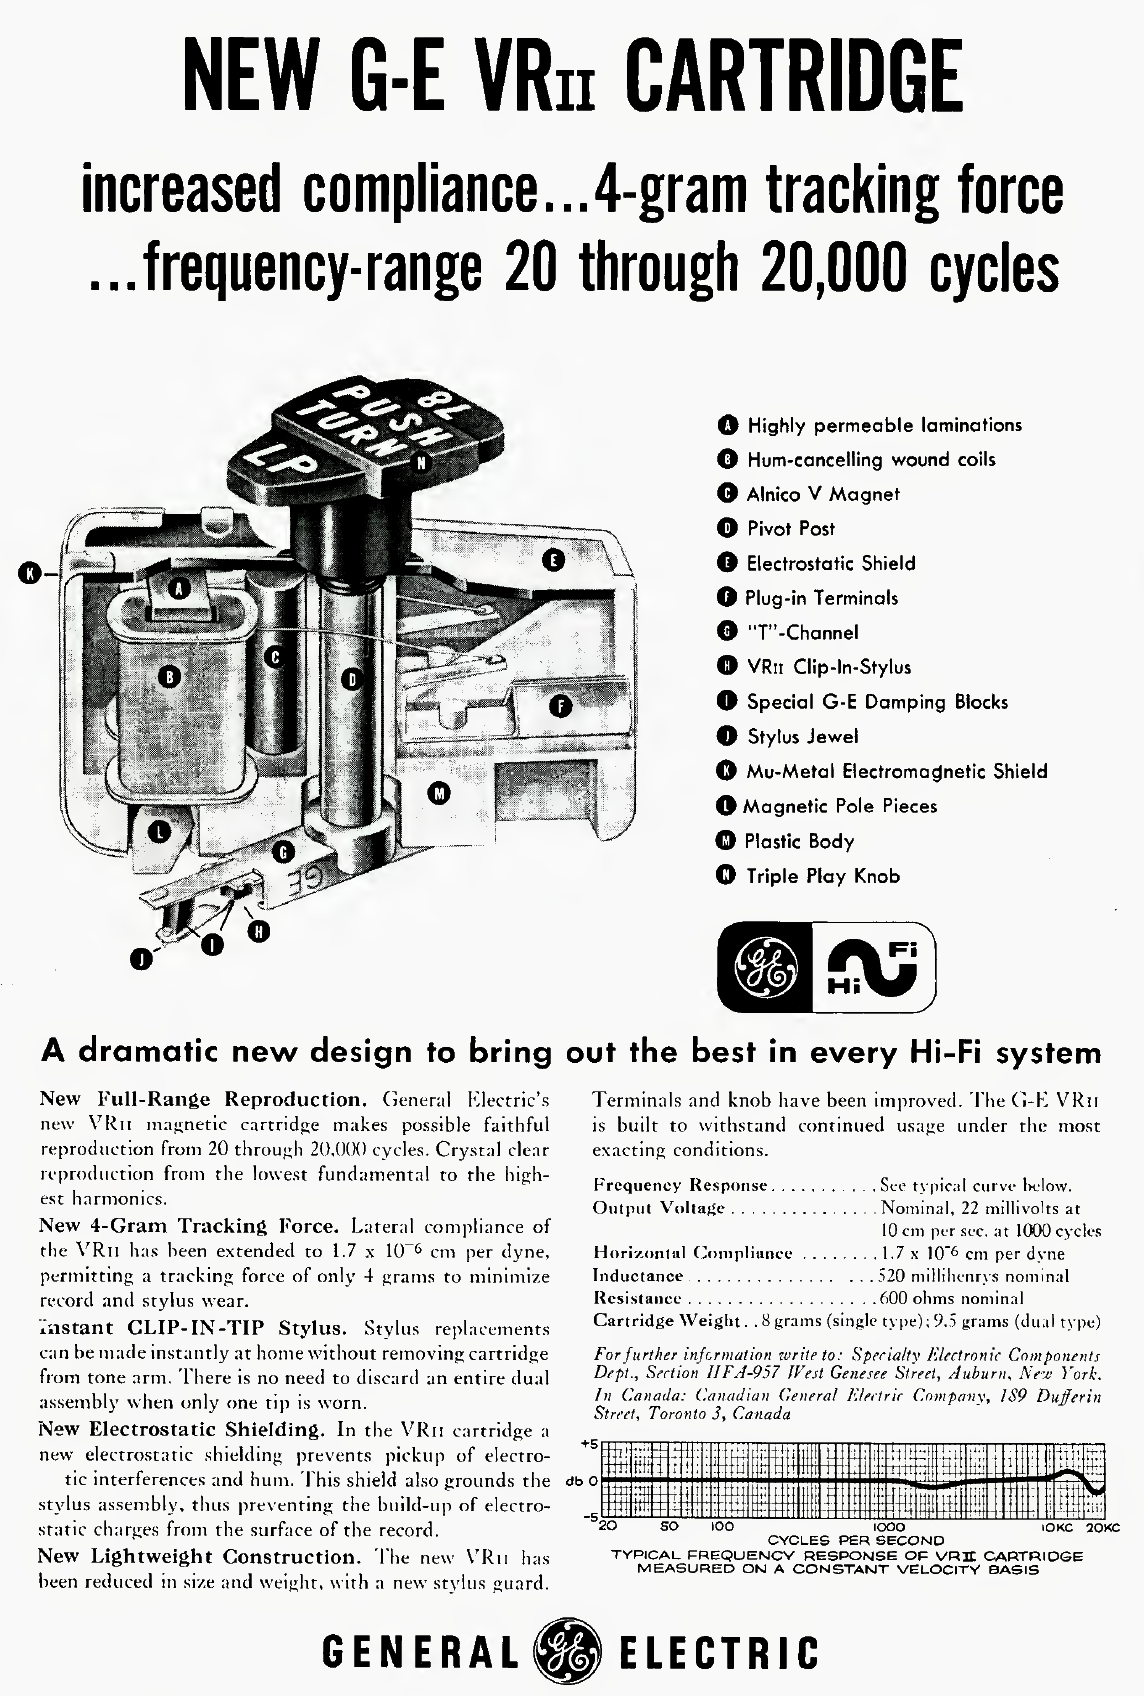 |
| 1957 ad for GE VRII cartridge |
I suspect that many audio enthusiasts shy away from vintage record changers due to their complexity, which brings along with it greater potential for mechanical problems down the road. But I had an ace in the hole by way of one Bill Pauluh, a veteran at servicing and restoring these changers. What’s more, an October 1956 Audio Magazine article also hipped me to the fact that the RC-121 incorporated a similar design to the Garrard 301 turntable, a favorite among vintage hi-fi enthusiasts: “Some of the features of the turntable drive have been taken almost directly from the professional single-play turntable, the 301…The method of motor mounting, of direct drive through an idler without rubber belts, and of changing the position of the idler to contact the proper diameter of the motor shaft all are like those in the 301.”
 |
| 1956 ad for Garrard RC-121 changer |
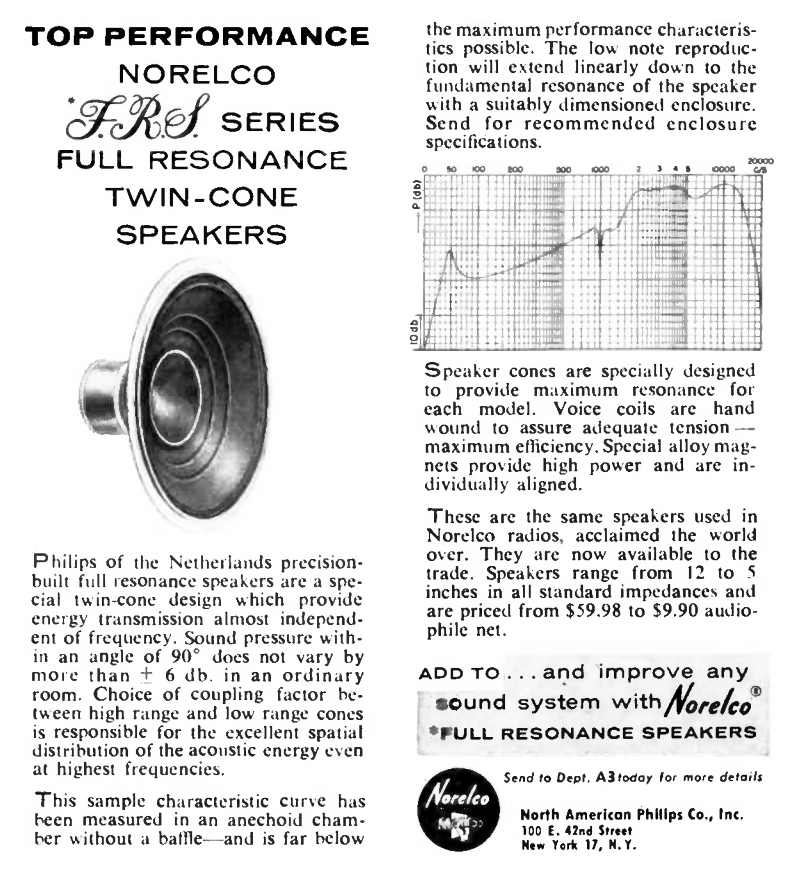
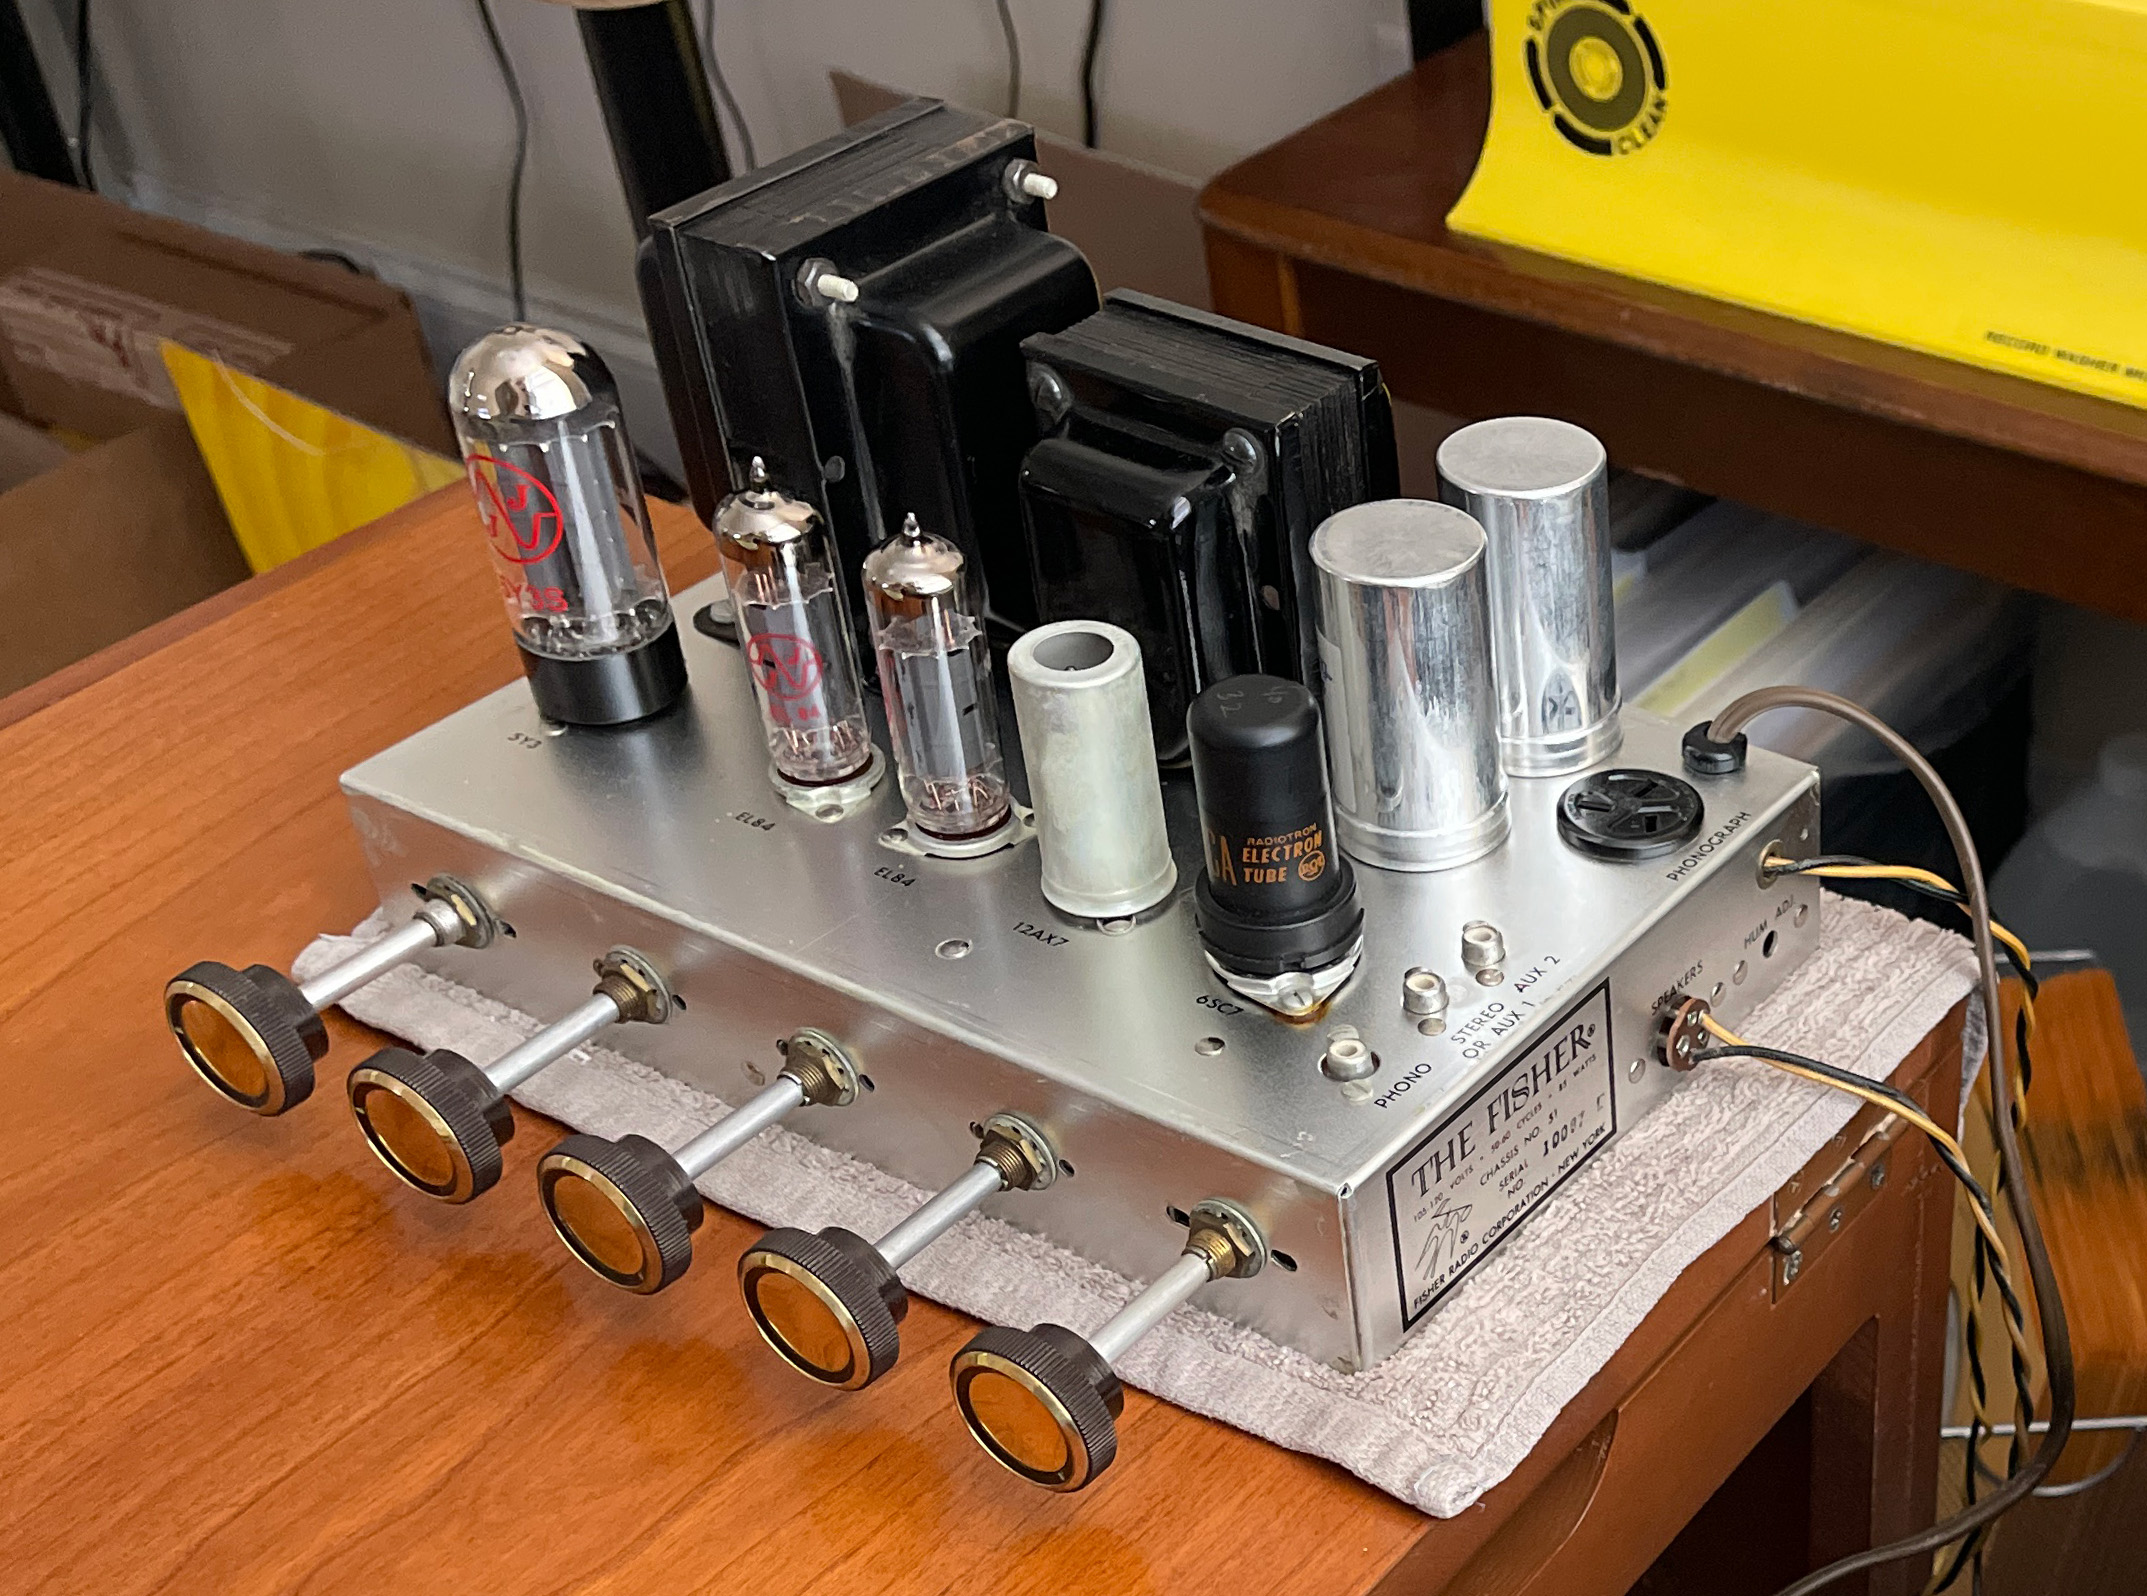
From the mono wiring of the RC-121’s tonearm, the signal then proceeds to the Fisher mono push-pull integrated tube amplifier rated at 32 watts peak, which incorporates a 5Y3 rectifier tube, 6SC7 phono preamplifier tube, 12AX7 drive tube, and pair of EL84 tubes for output. The amplified signal then proceeds down through the lower cabinet’s sealed speaker enclosure to a trio of full-range eight-inch speakers with alnico magnets wired in series: two Philips Norelco brand and one Jensen (the Jensen is intended to provide low frequency support). There are no crossovers in the Model 51’s design.
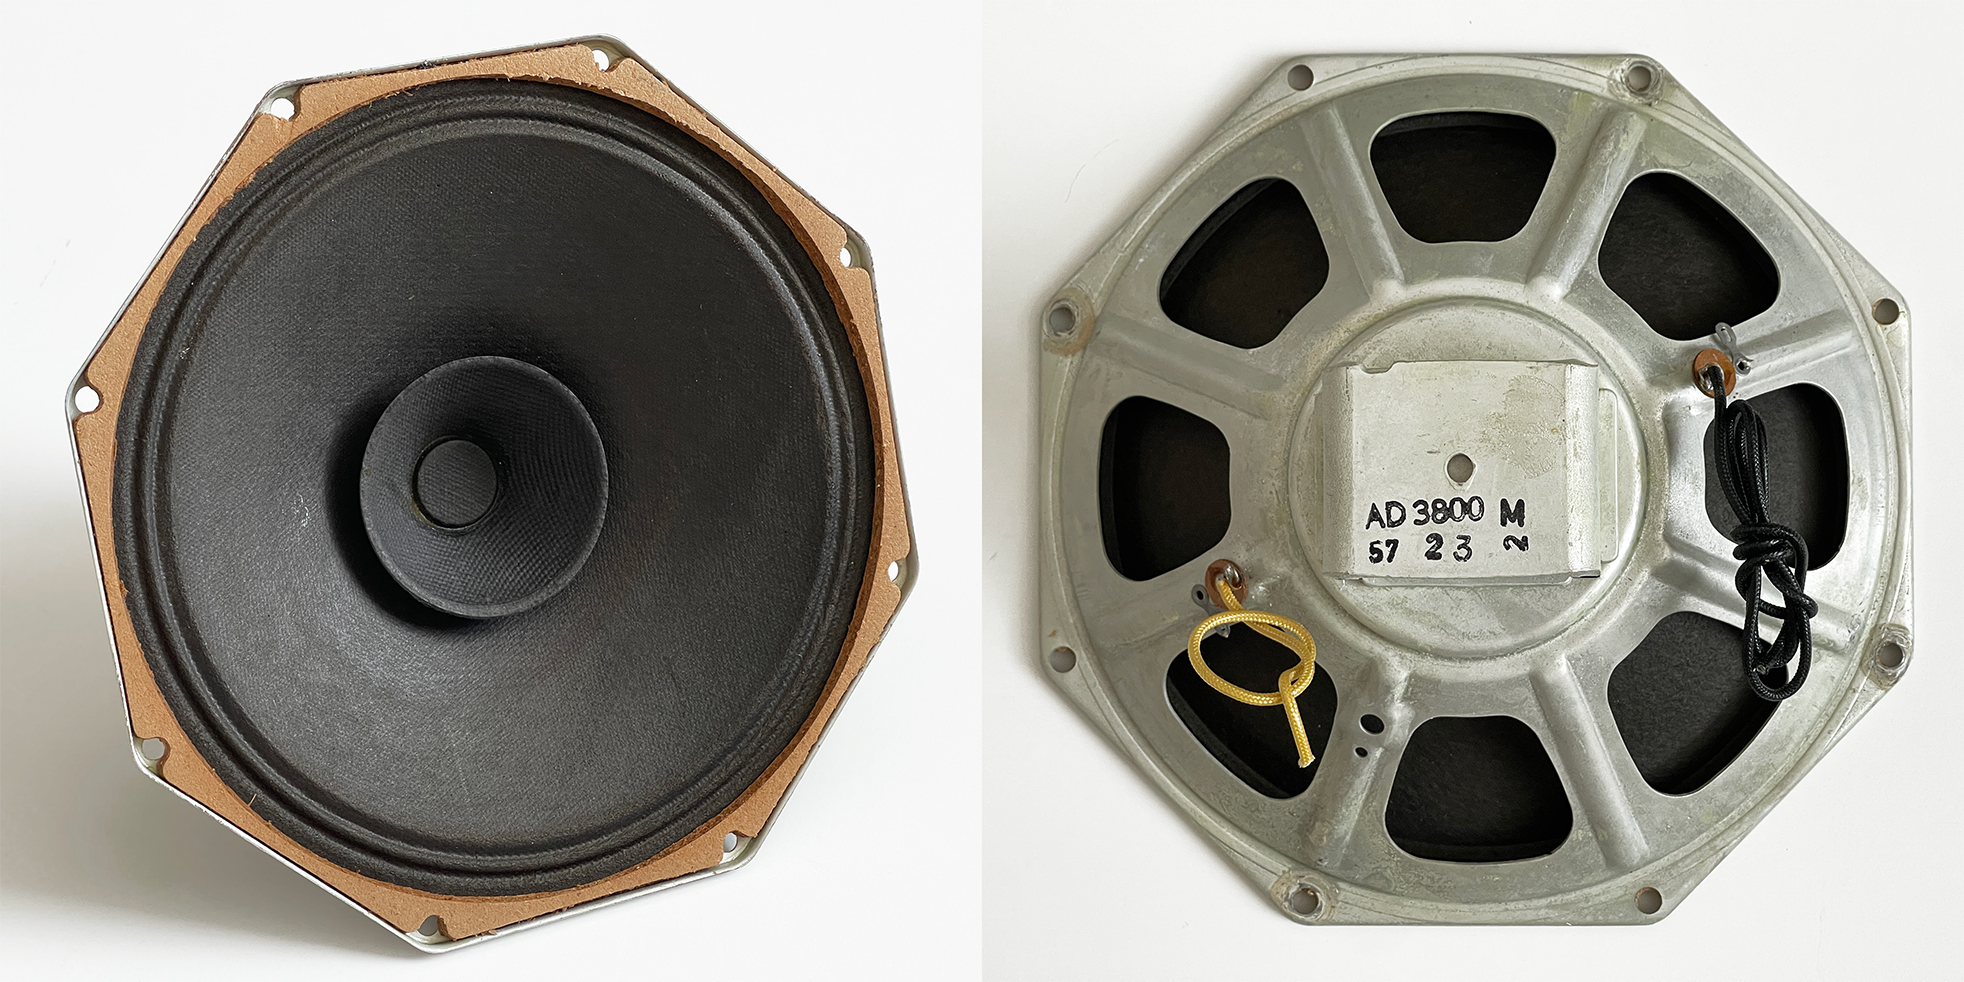 |
| Philips Norelco 8-inch “F.R.S. (Full Resonance Speaker)” — note the date on the back, the 23rd week of 1957 |
Getting the Console
I recruited a friend to be my copilot for the trip to Ohio. Upon arriving at the seller’s cluttered antique store, we found the console in the back. It looked to be in great cosmetic condition, and while it indeed worked, there was a bit of a burning smell coming from the amplifier, and the sound left much to be desired. Powering it off immediately, we loaded it into my friend’s S.U.V., cash changed hands, and we headed back to Albany.
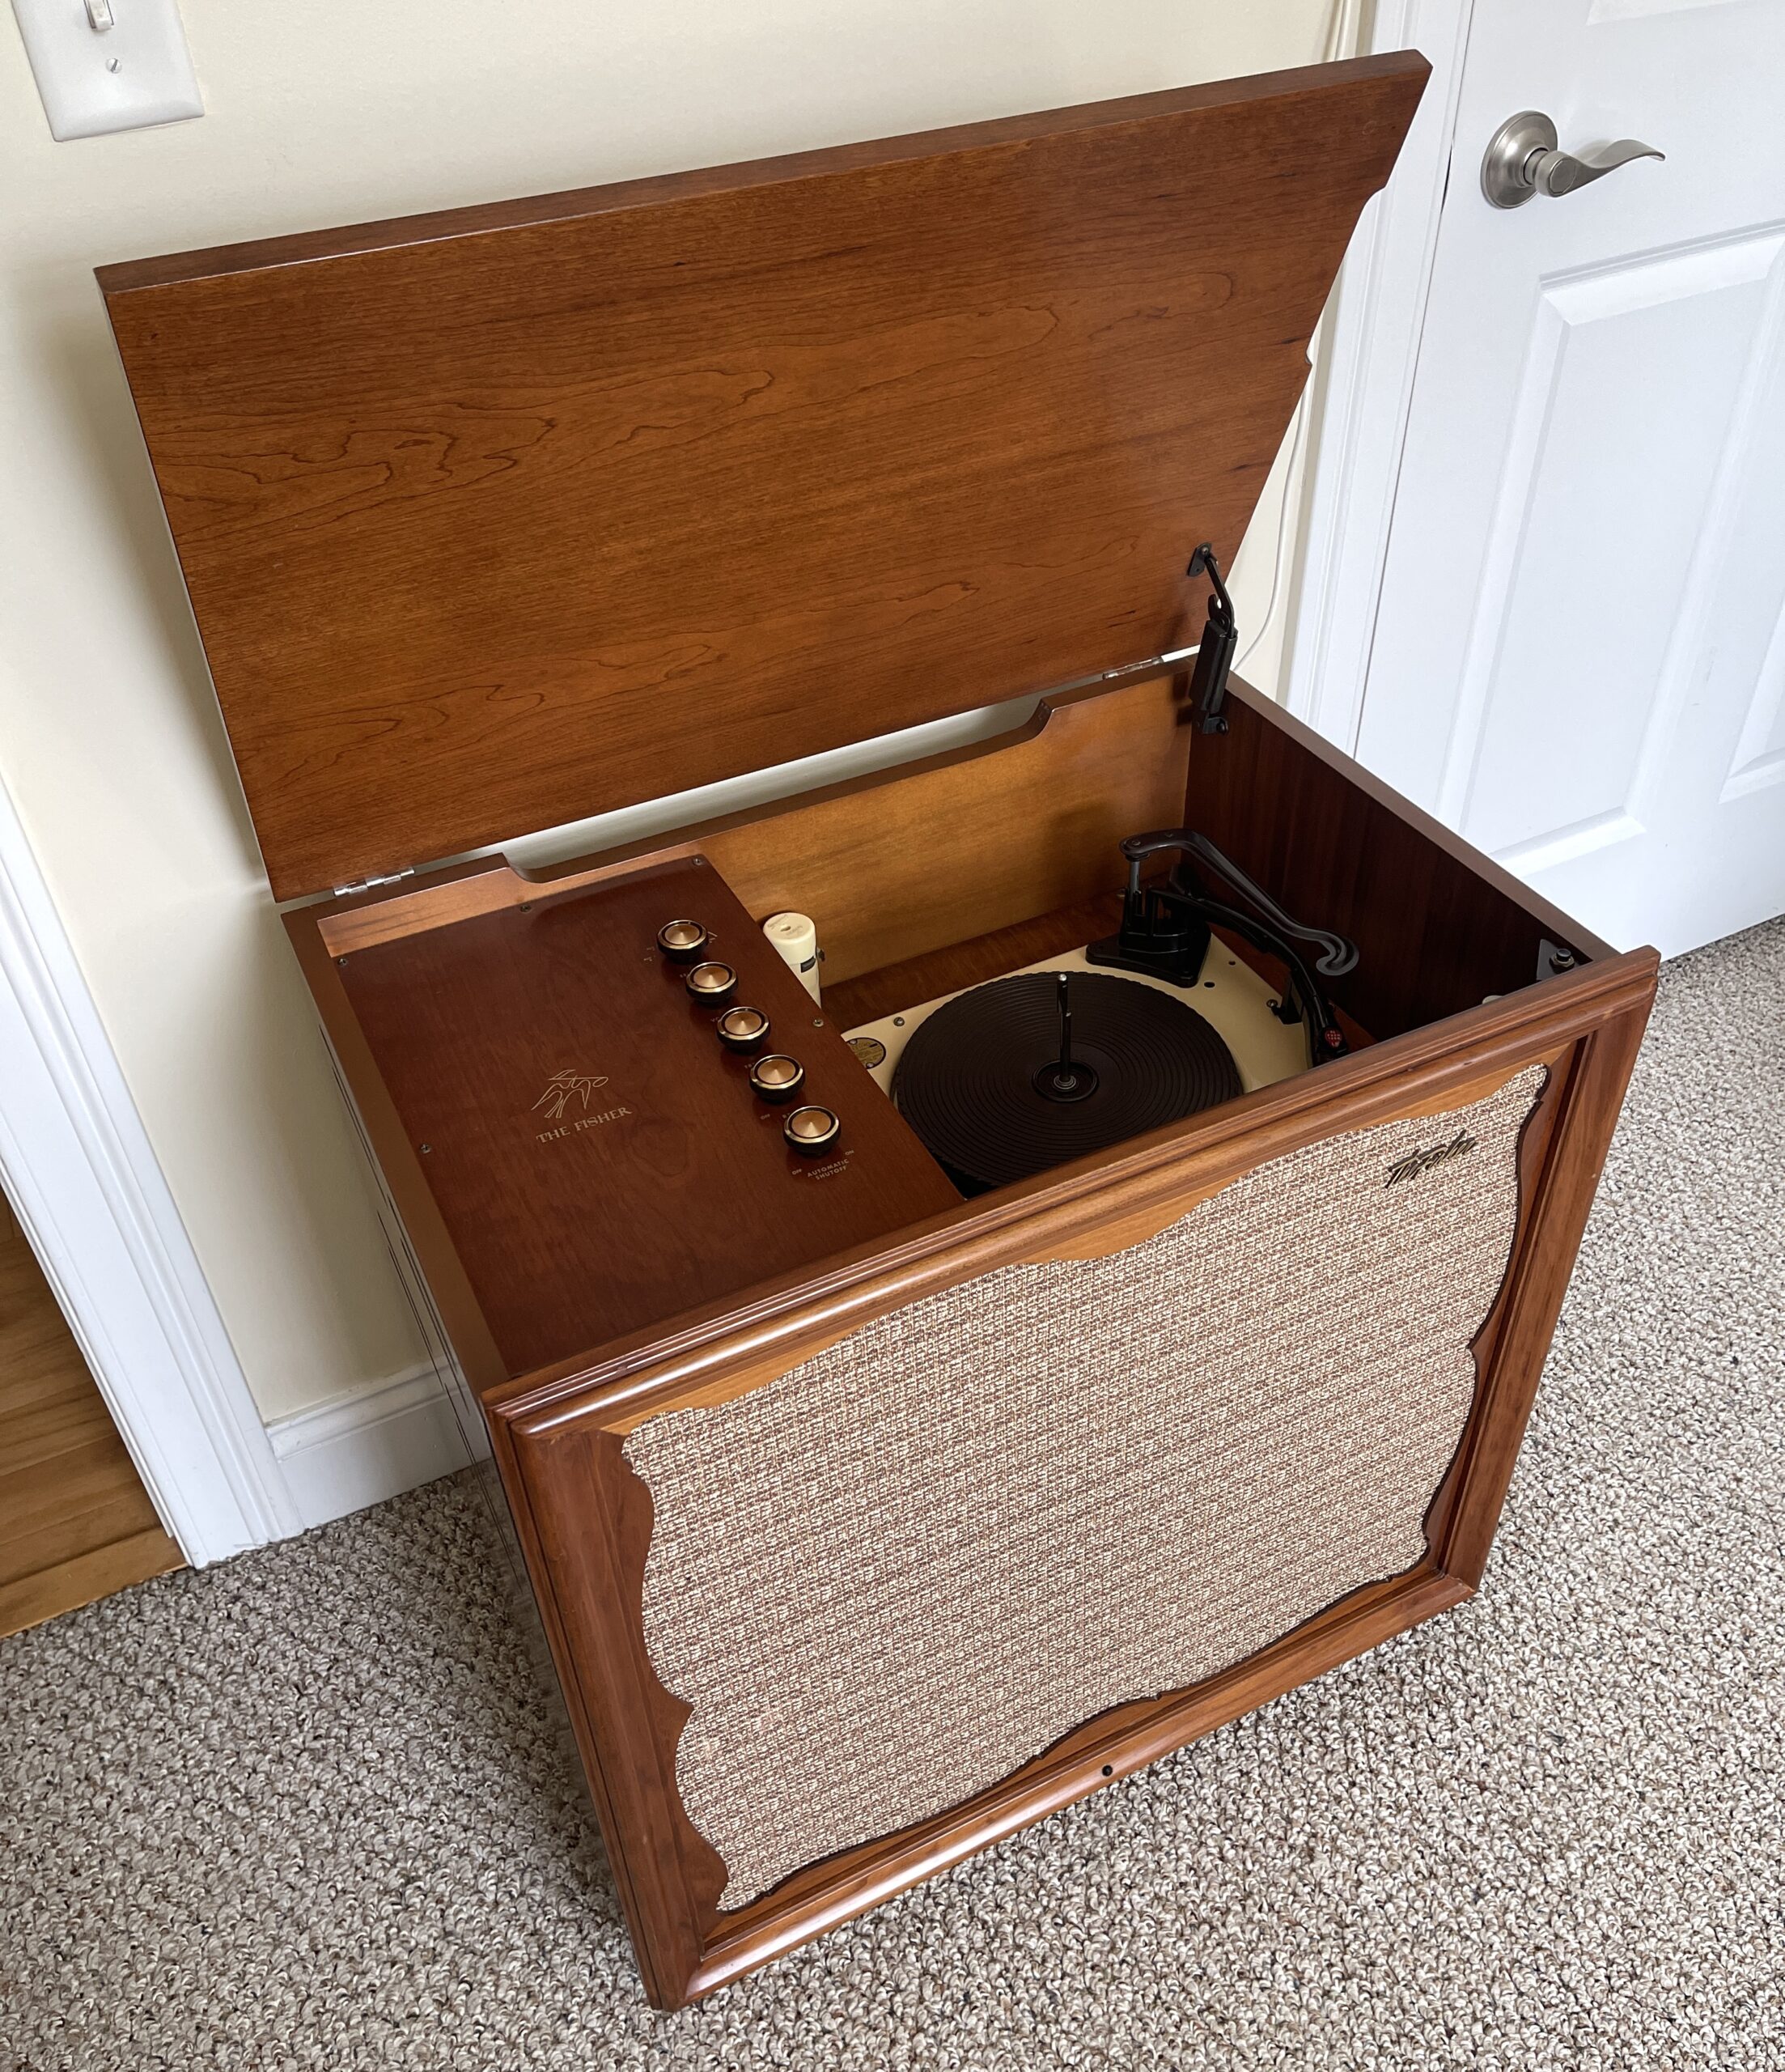
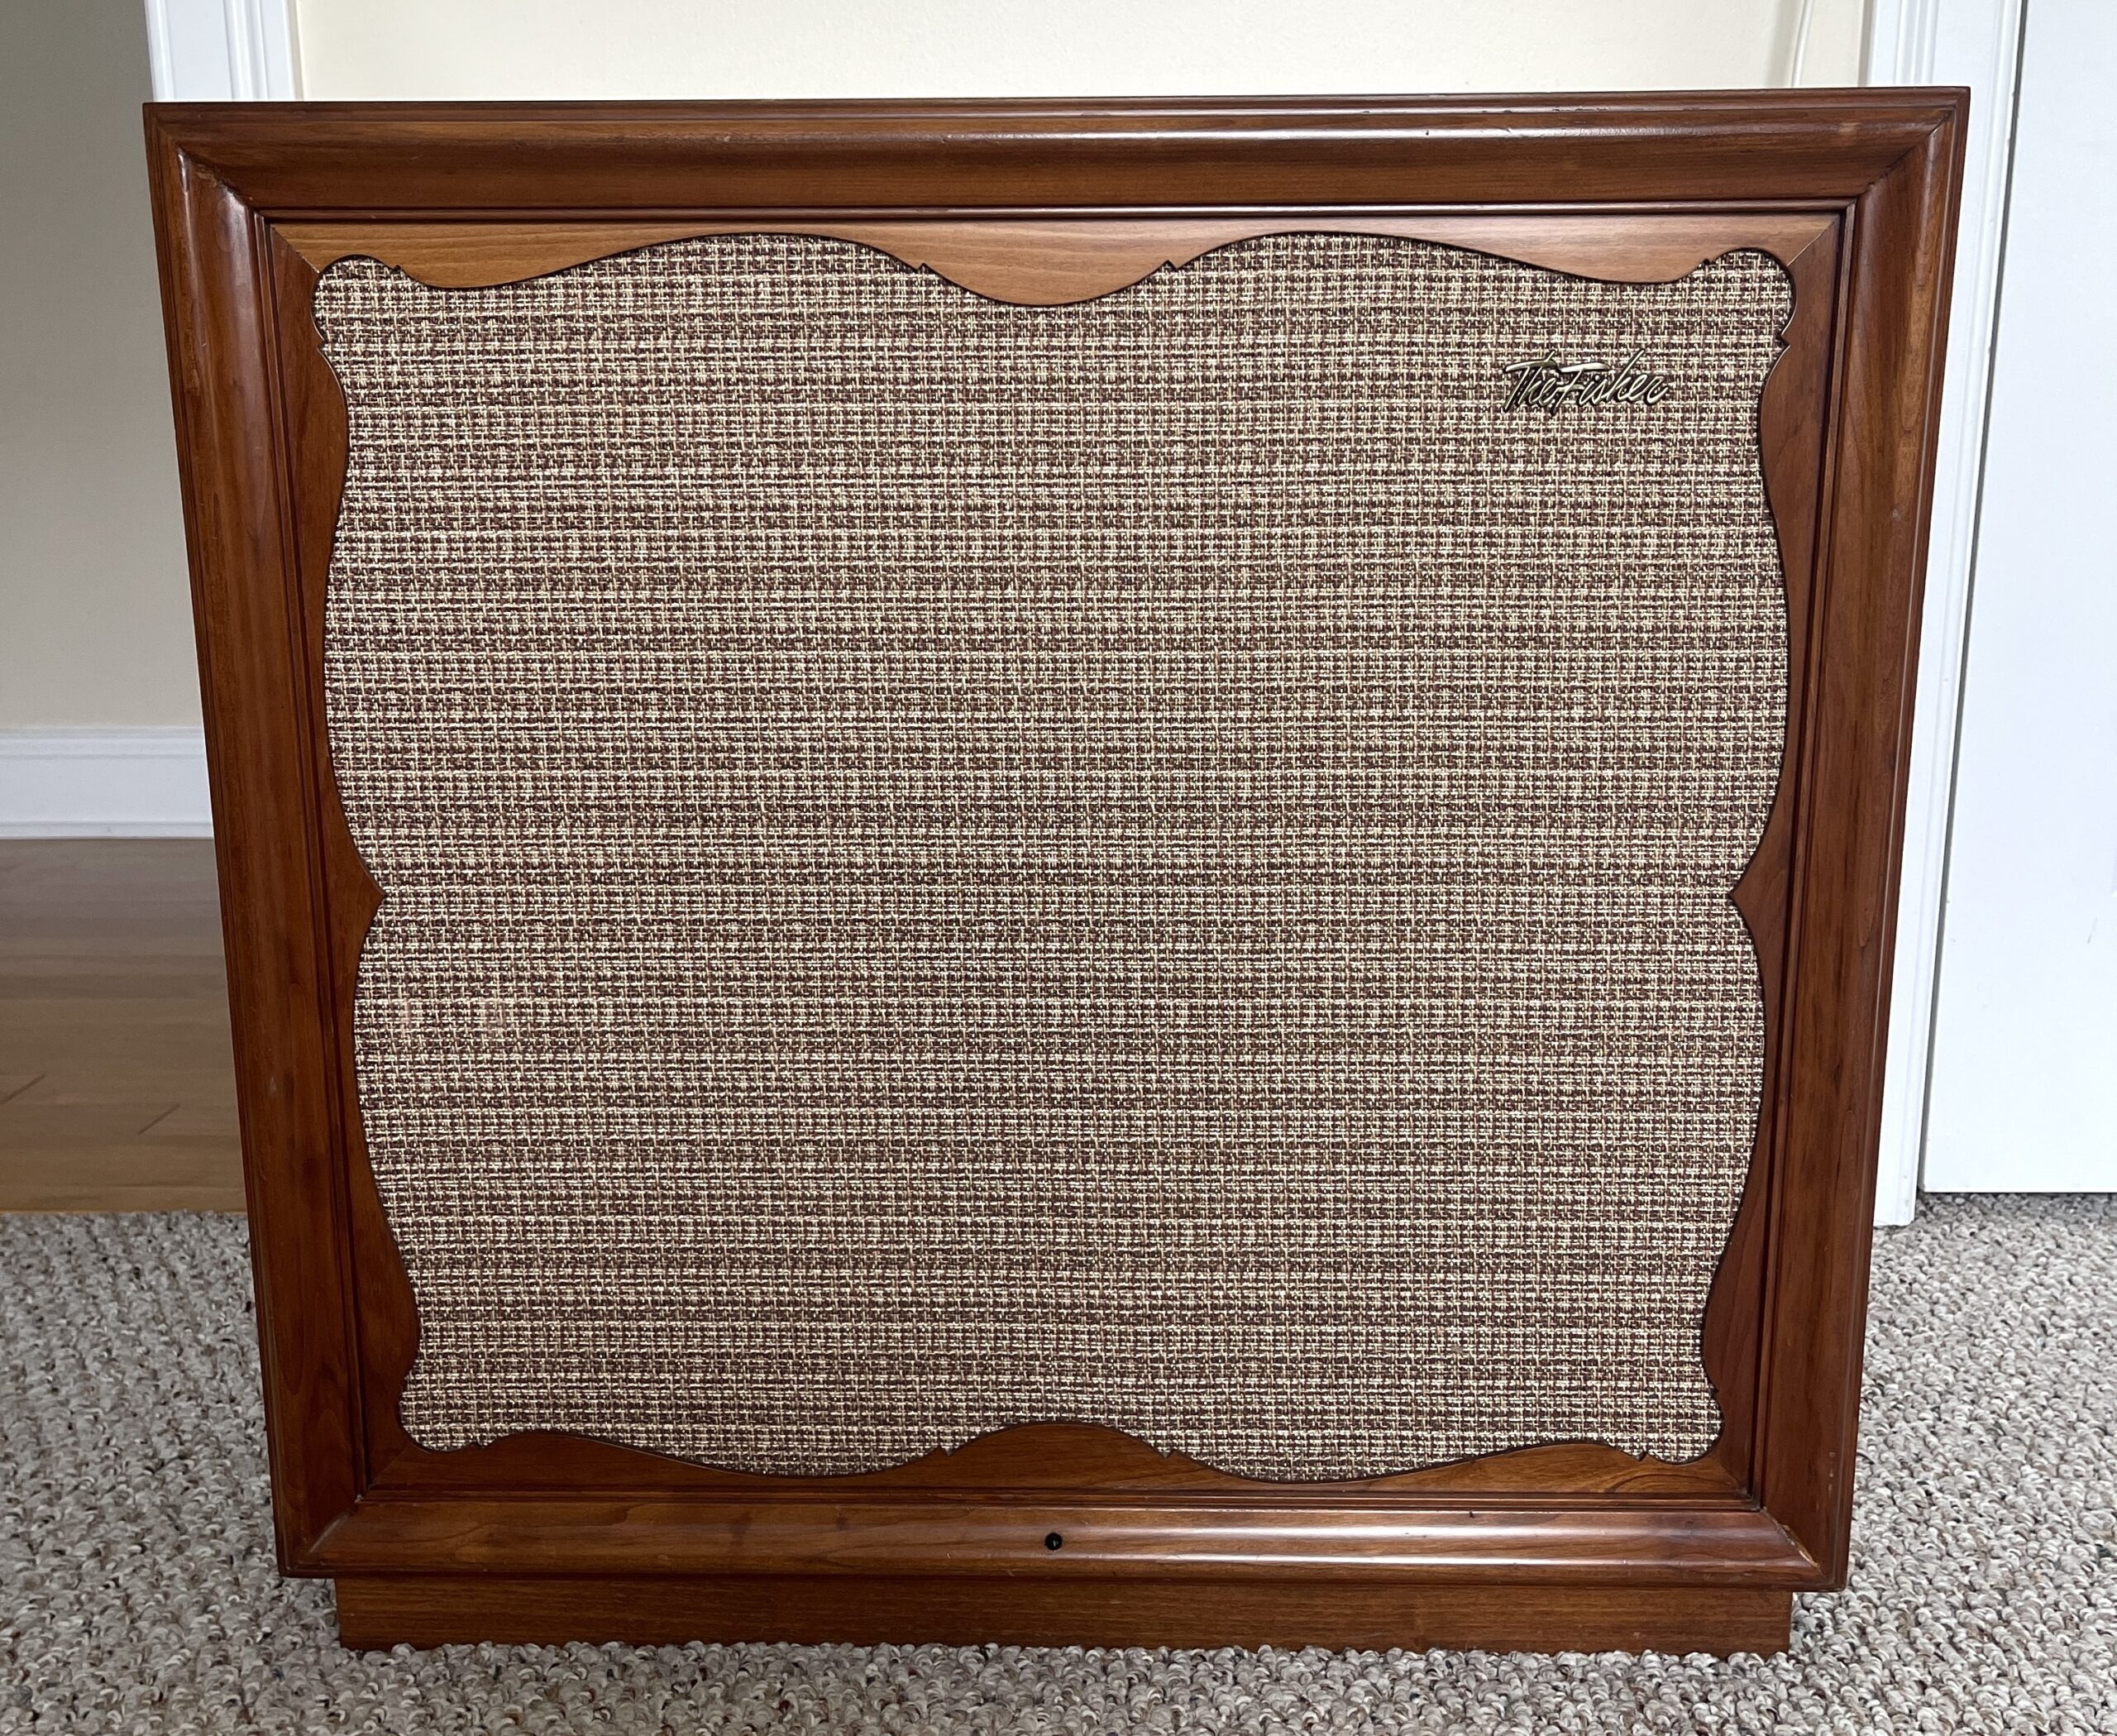
Upon getting the console home and sharing more photos with Bill, he explained that it appeared to be virtually untouched with all the originals parts. This made sense since the seller said it came directly from the original owner. Frankly, the condition of the unit was and is amazing. The grille cloth is in pristine condition with “The Fisher” metal badge in tact. The silkscreen Fisher logo and tone control descriptions were all still beautiful. It also came with the original 45 changer adapter, and the interior dome light was still working.
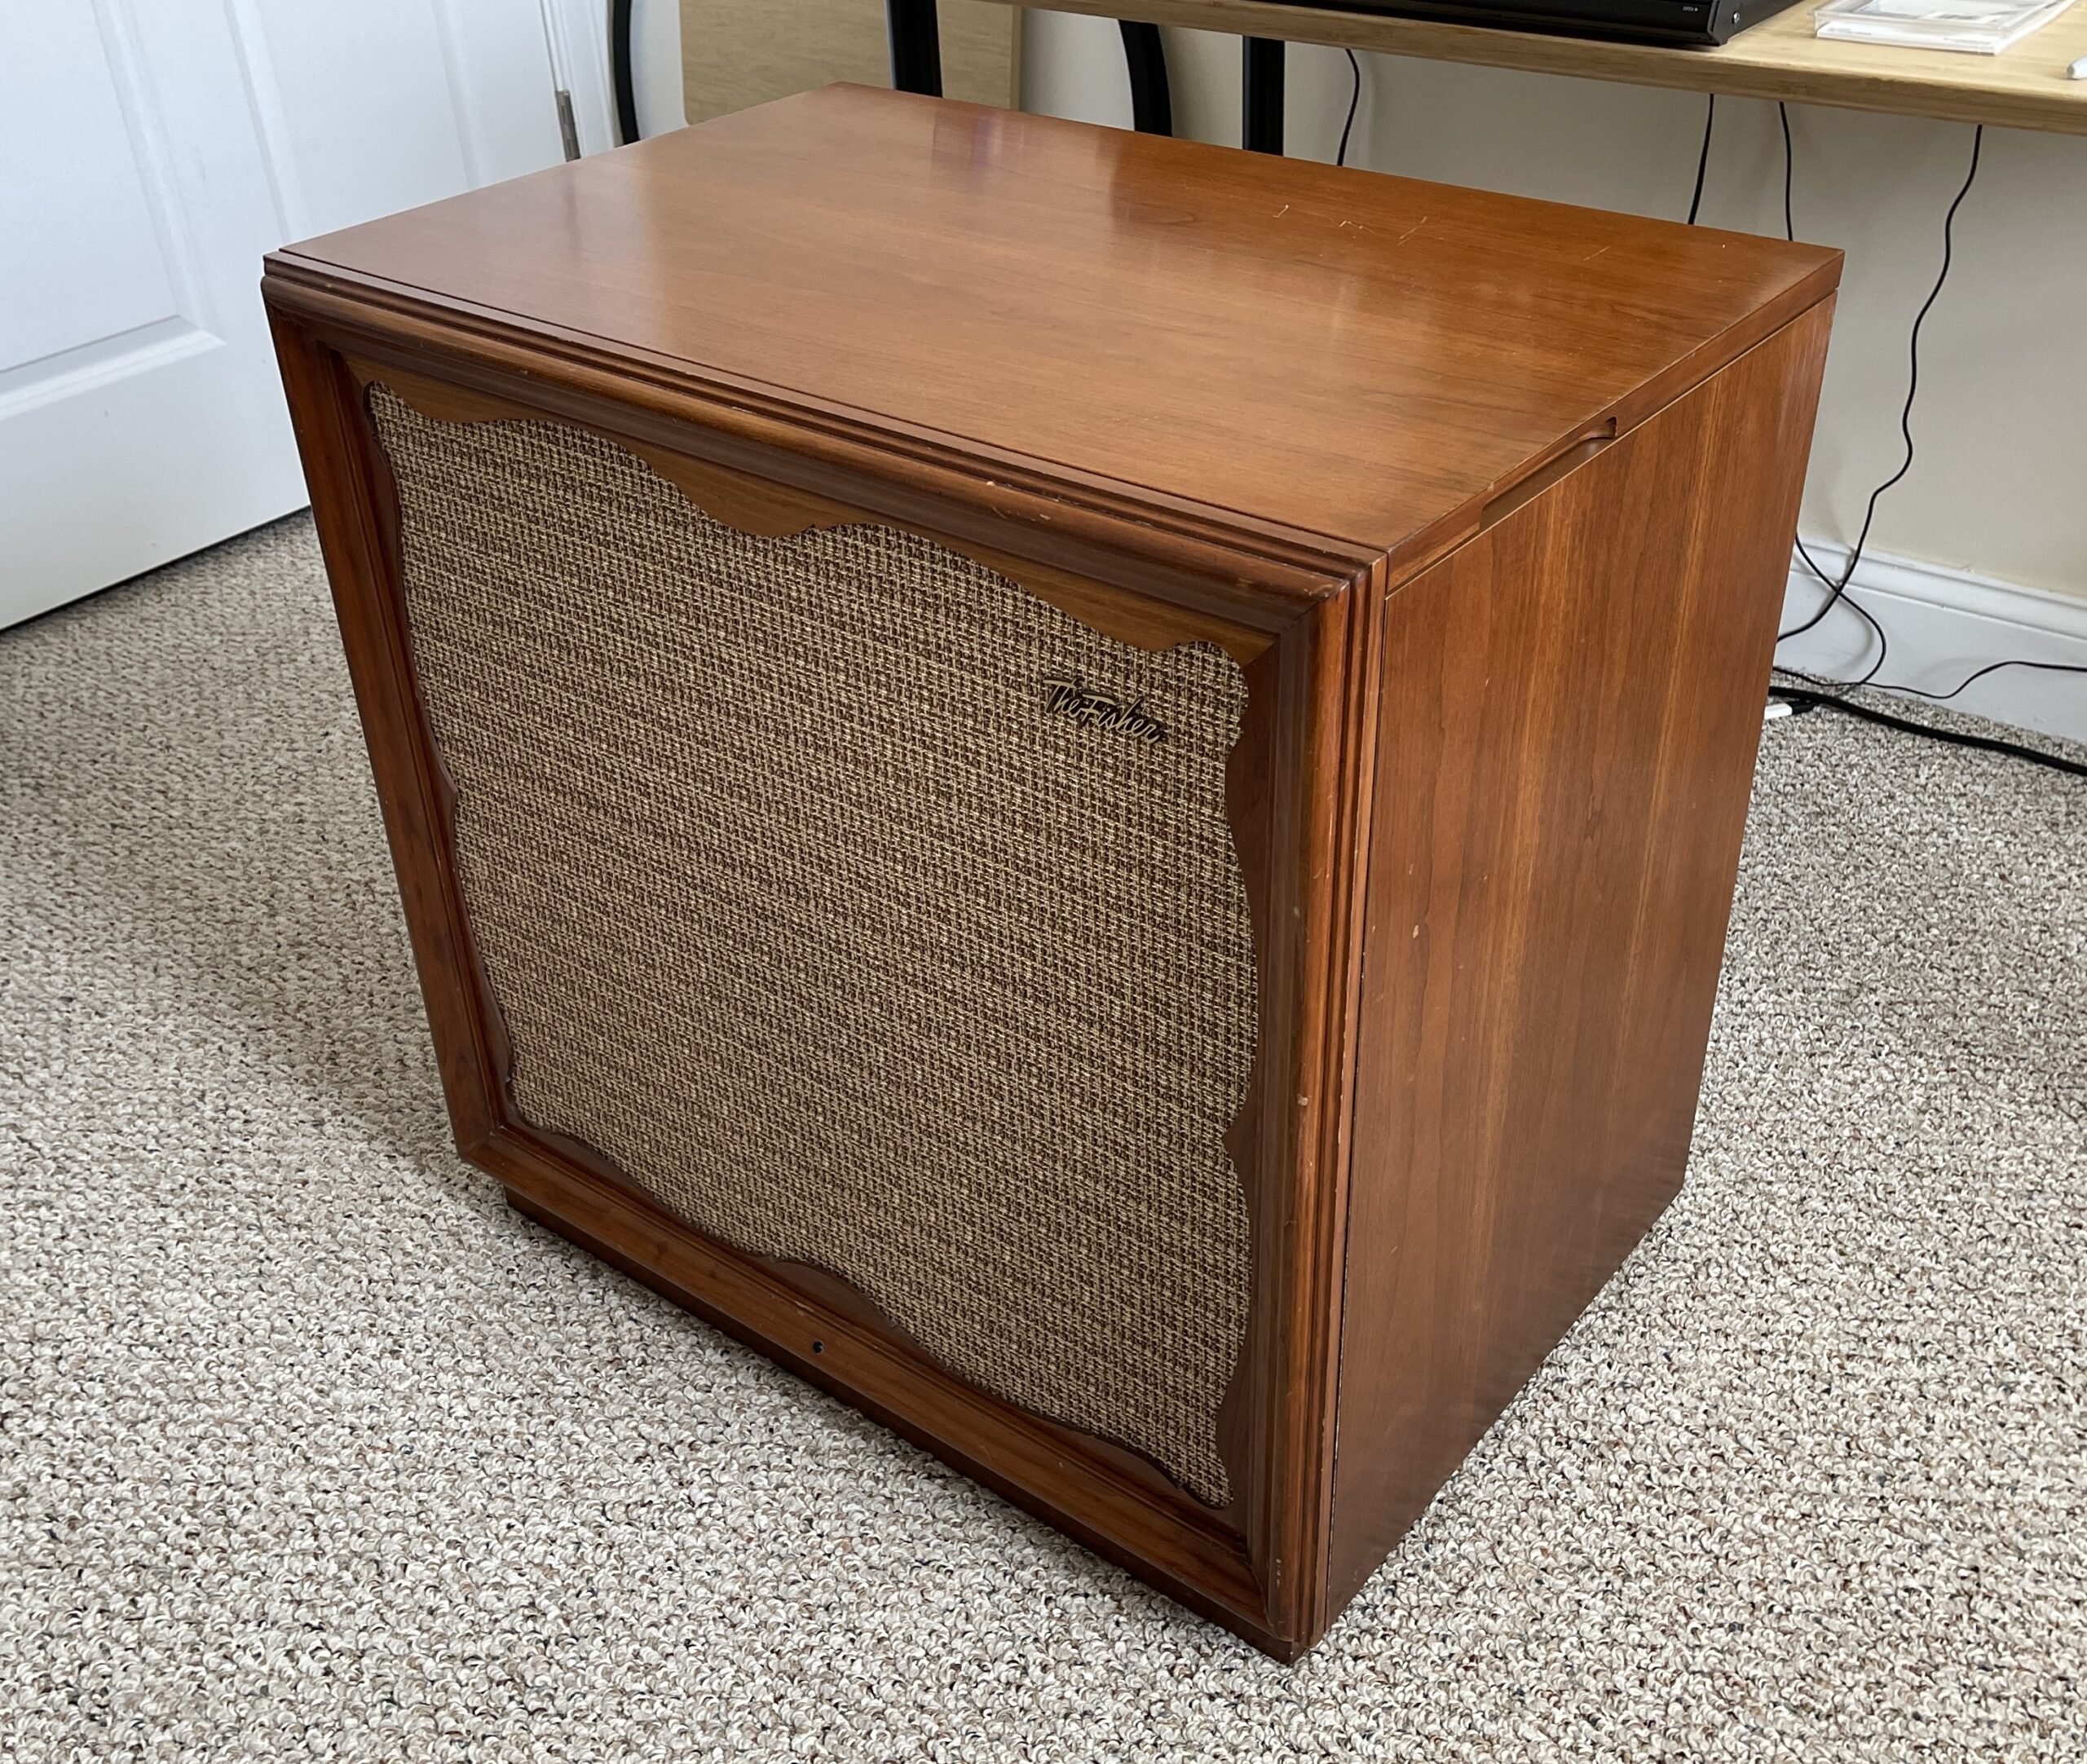 |
| The console before restoration |
Bill first advised me to place an order with Antique Electronics Supply for all the capacitors, resistors, and tubes needed. He also linked me to a company making replacement idler wheels for Garrard turntables. I had been collecting VRII cartridges and styli since I got back from Japan so I already had those.
Let the Restoration Begin
We worked on the amplifier and record changer in four-hour shifts once a week. I drove an hour and 45 minutes each way to Glastonbury every weekend for five weeks. Work took place in Bill’s basement, packed to shoulder height with boxes of records and cool vintage equipment.
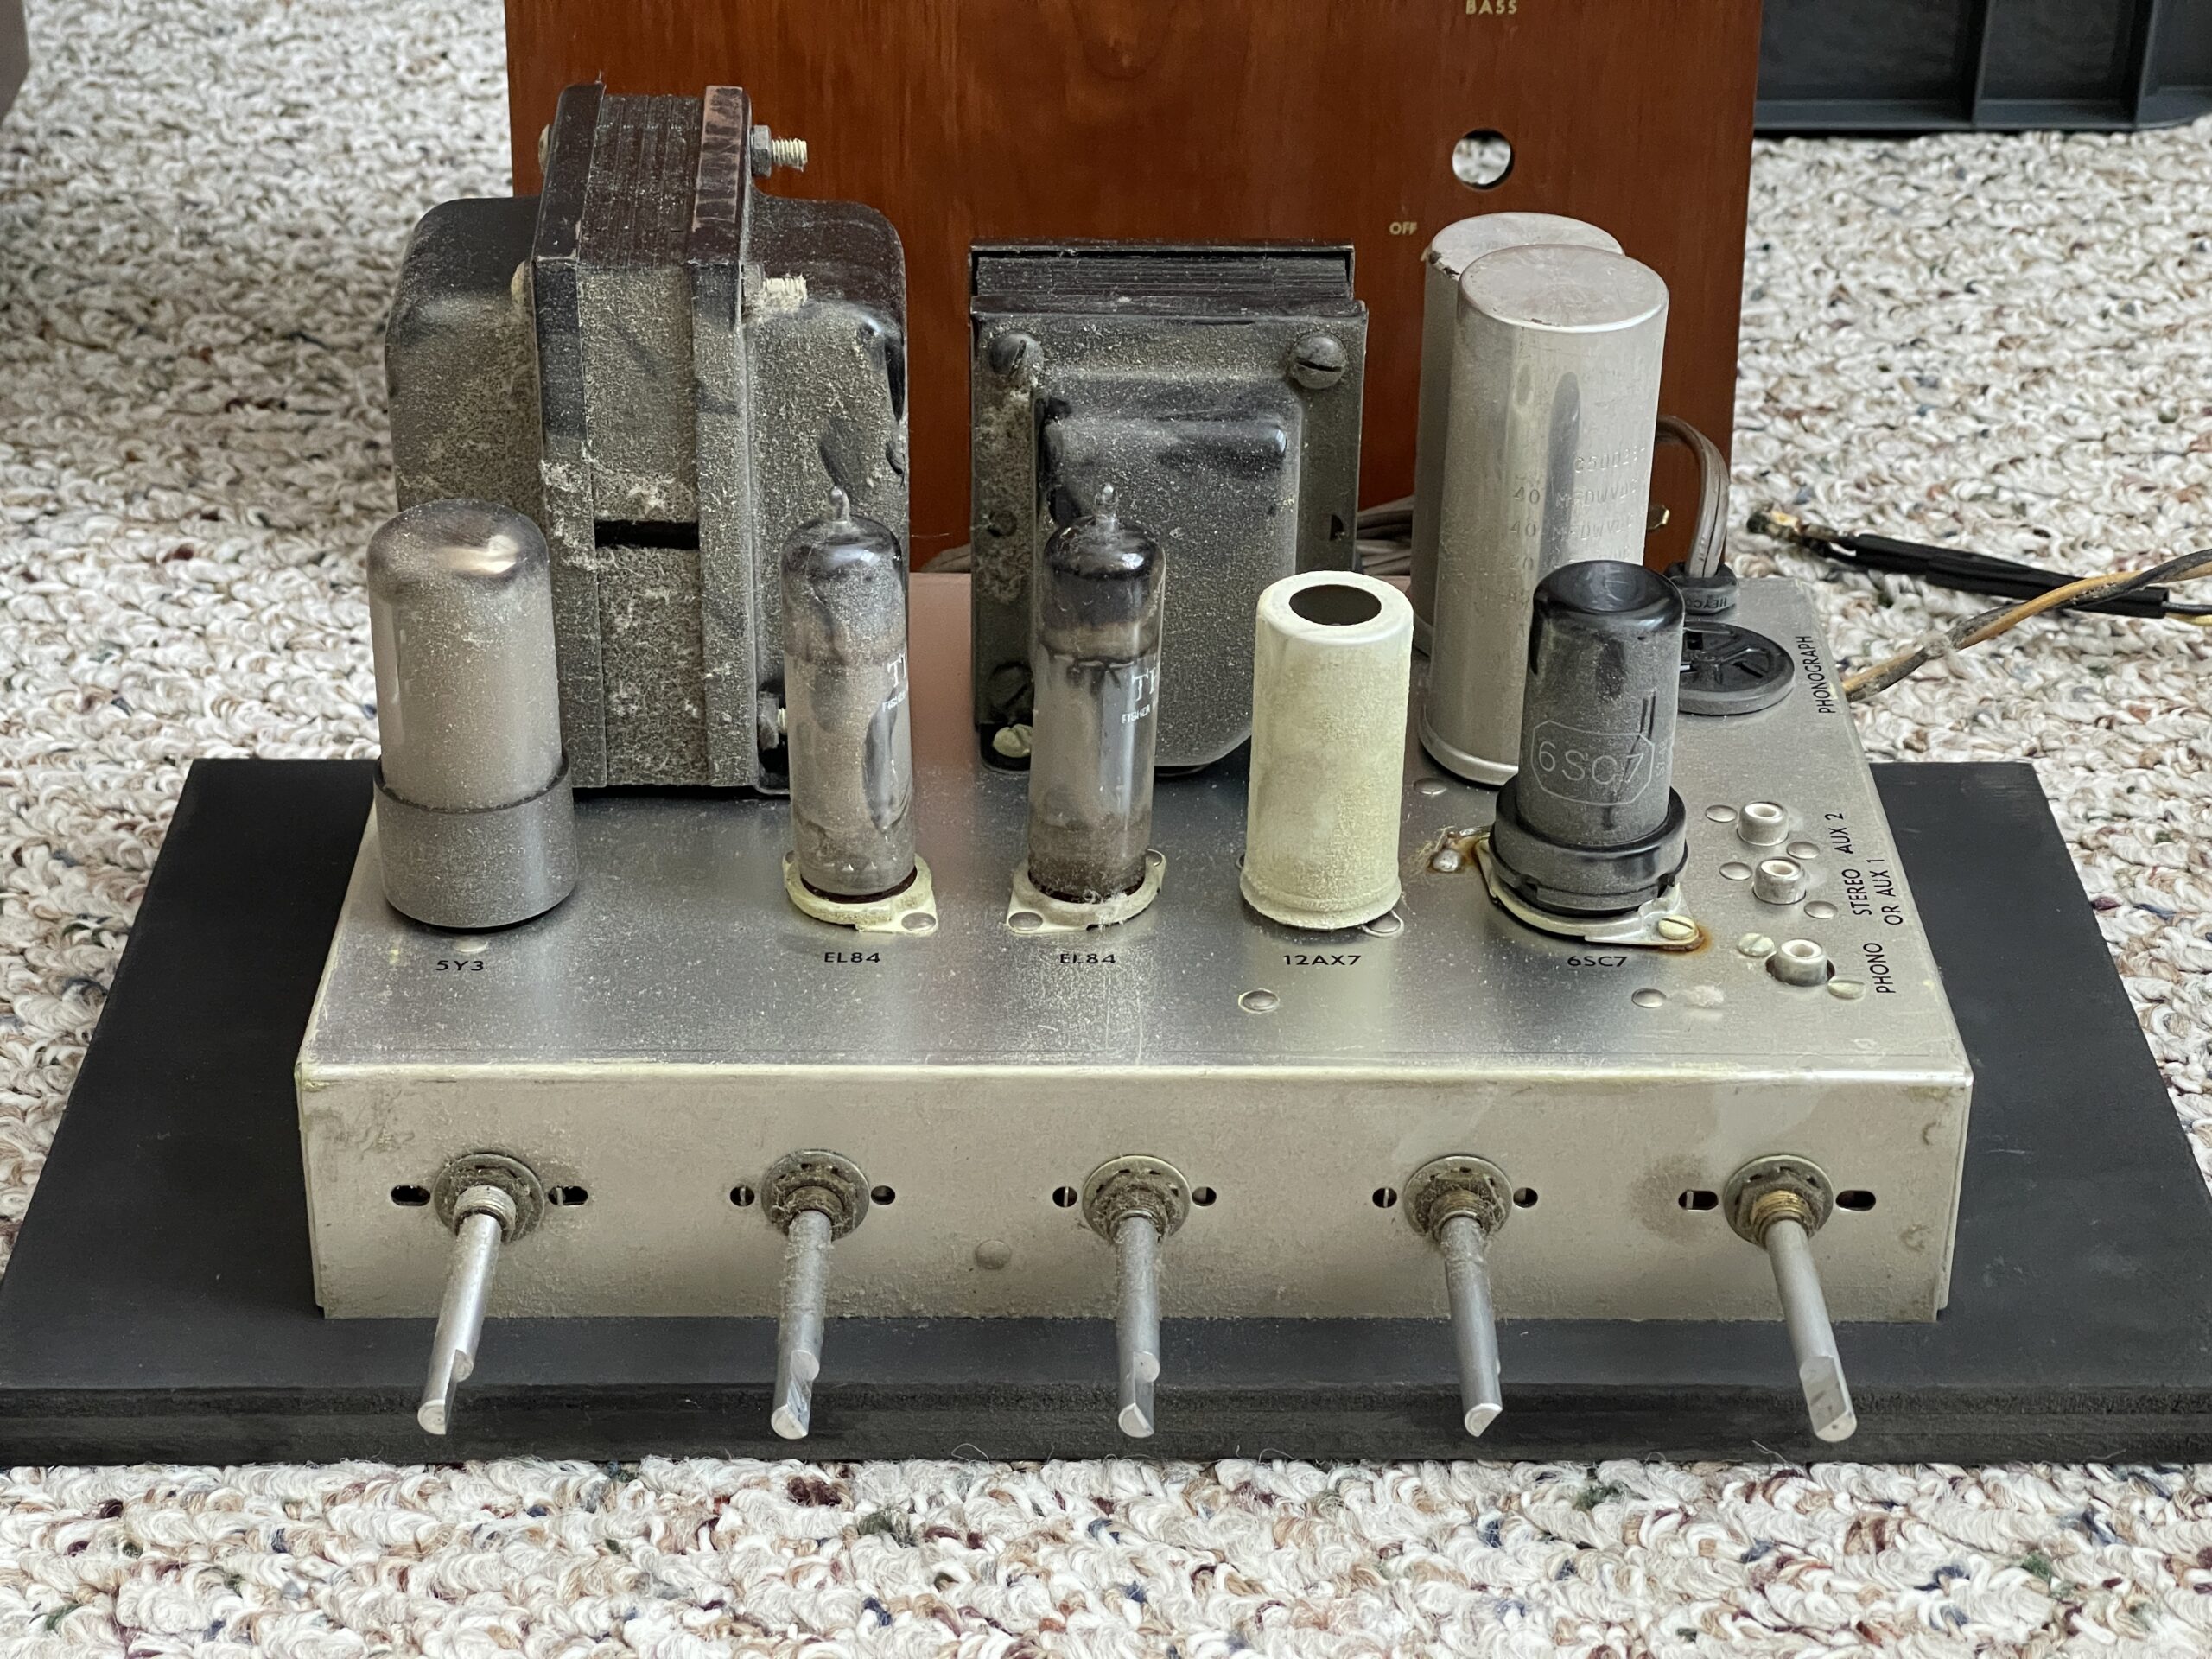 |
| The amplifier immediately after being pulled from the cabinet |
We worked on the amplifier first. It took three meetings to swap out the capacitors and resistors. Learning to desolder was quite a challenge, but after a few hours of practice I felt I finally had it down. Despite our plans to replace all the original Fisher and Mullard tubes with new ones, the old tubes tested surprisingly well for their age. In week three we used Deoxit on all the pots, then we finally powered up the amp for the first time. We used a variac to slowly bring the AC voltage up to 120 volts and the B+ up to around 375.
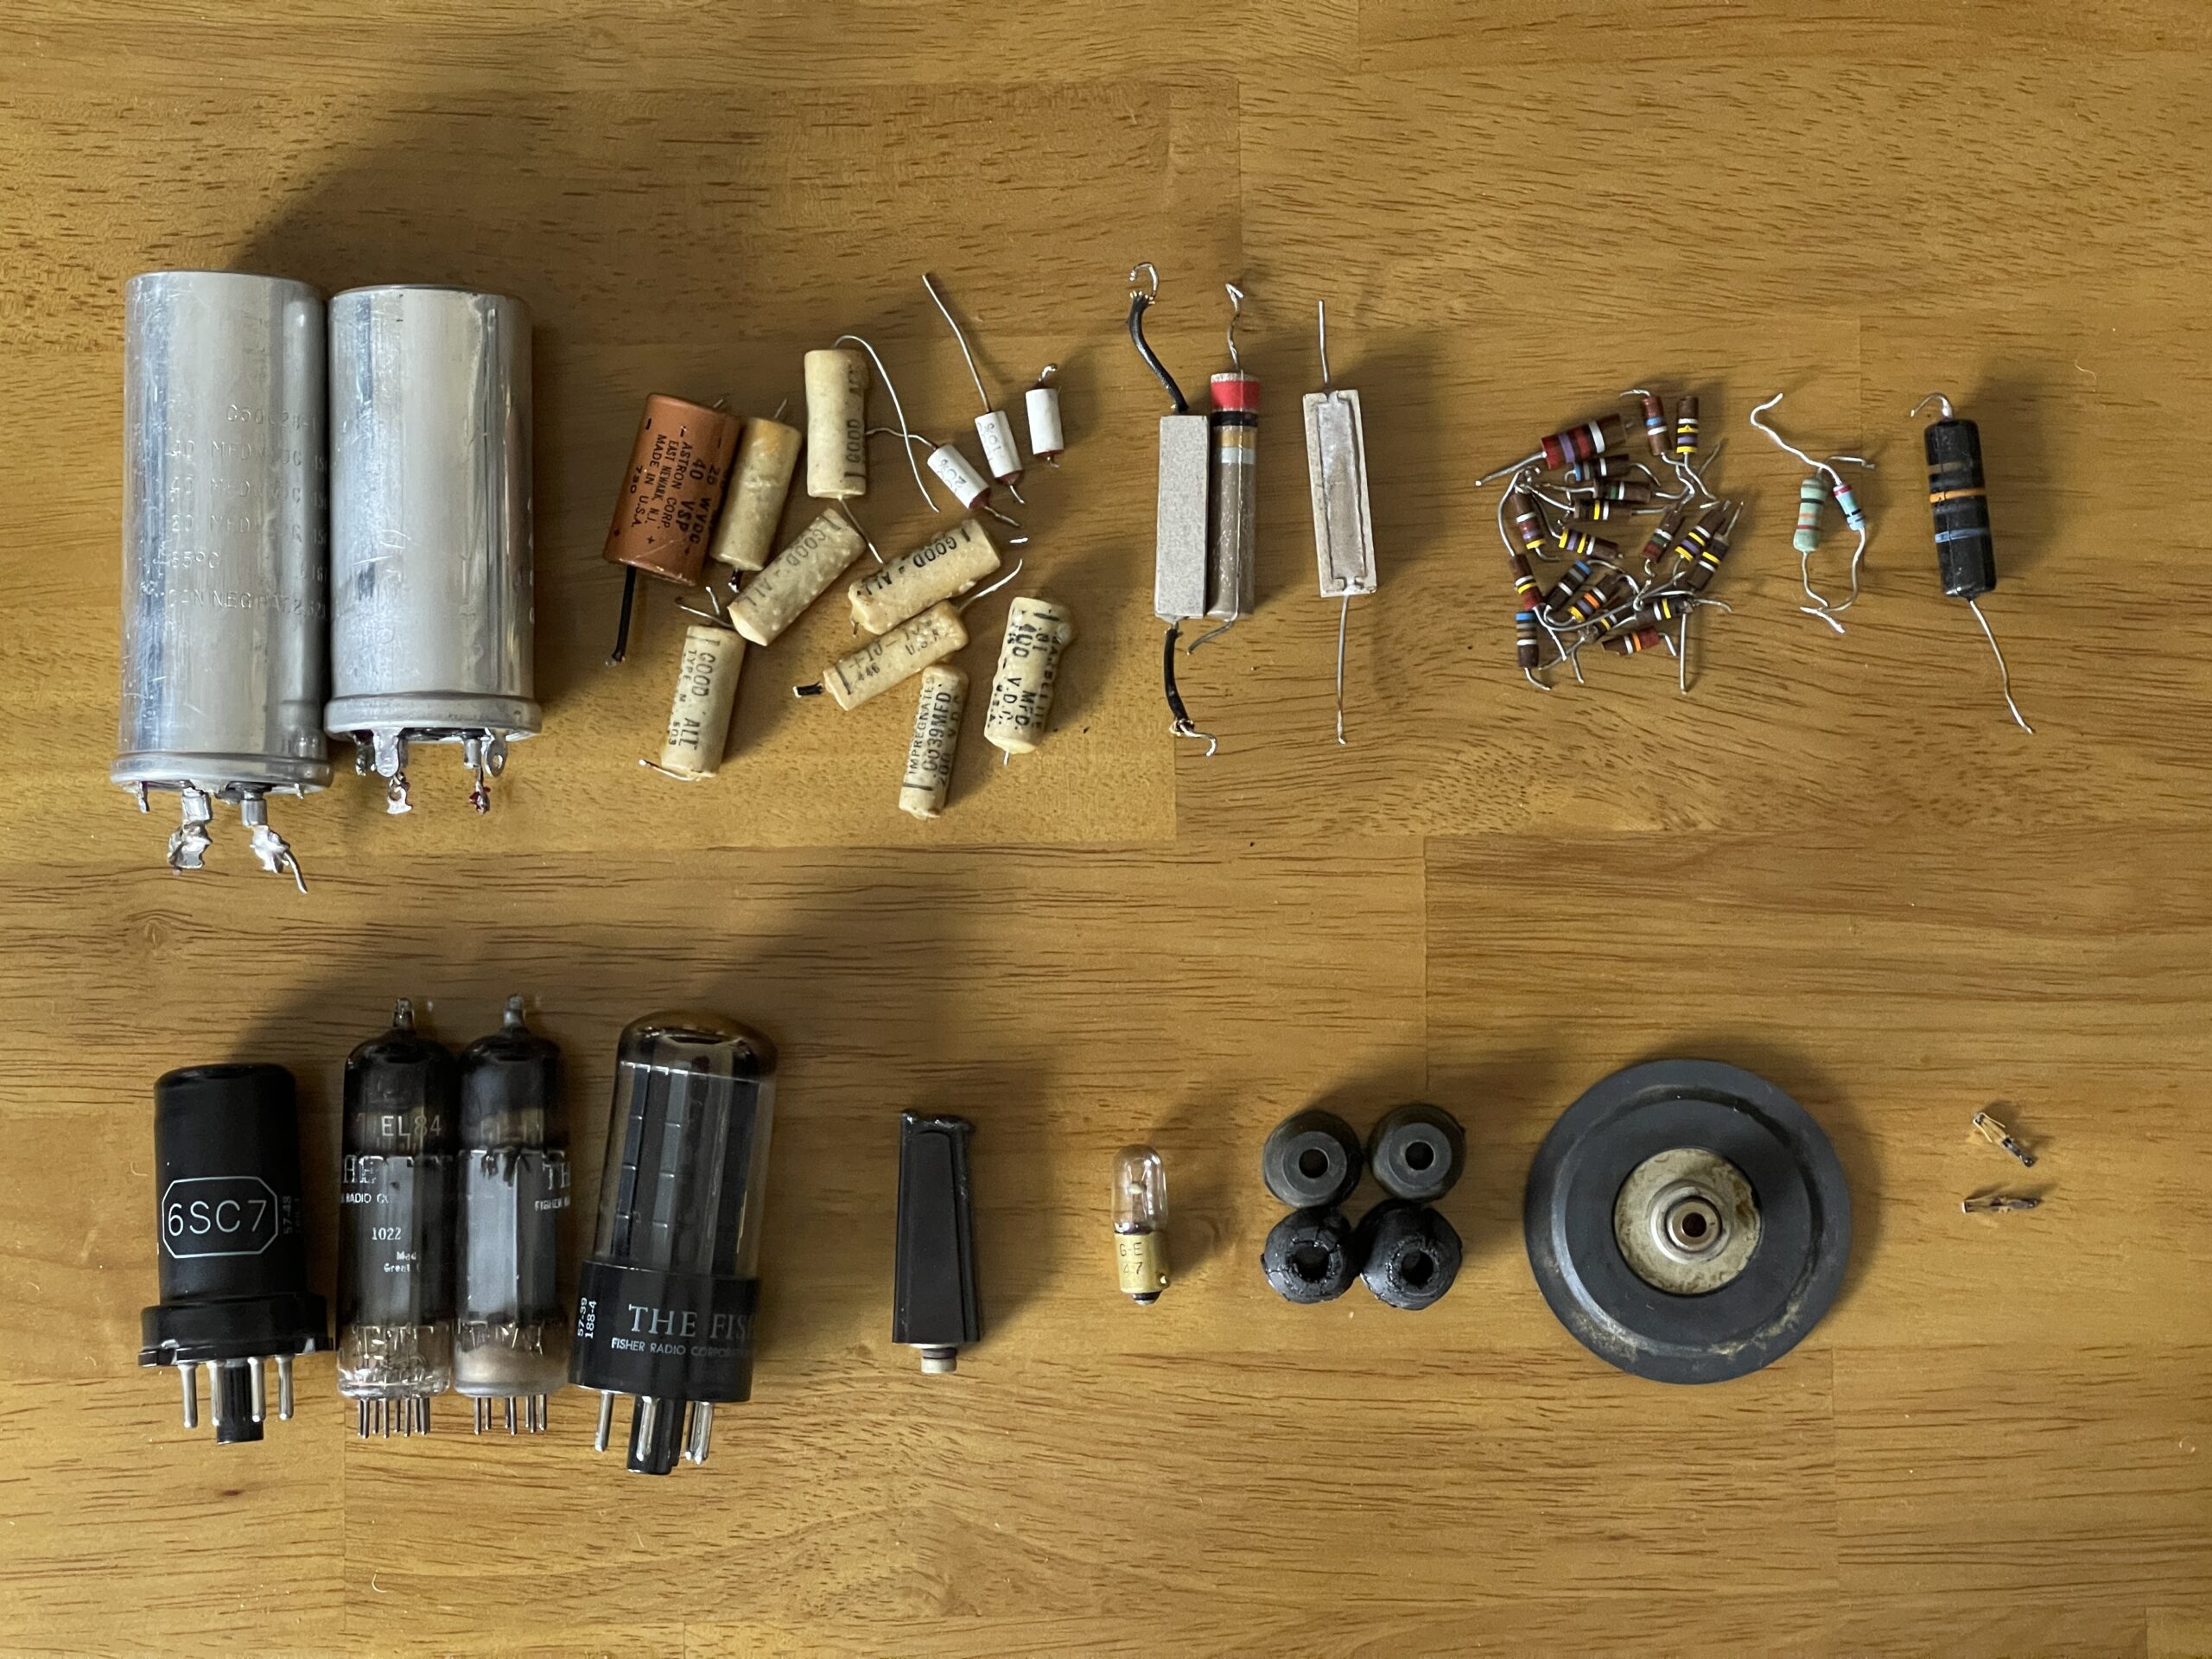 |
| All the removed parts: capacitors, resistors, tubes, tonearm rest, power light bulb, rubber motor mounts, idler wheel, styli |
What a great feeling that was. To be honest, I was a little intimidated by the amp’s point-to-point wiring, which can kind of look like a big jumble of wires, caps, and resistors to the uninitiated. So when those tubes lit up for the first time, it felt like a virtual miracle to me. We then picked out a Jimmy Smith 45 to throw on Bill’s vintage Califone test player, and before I knew it, the sweet sounds of Stanley Turrentine’s sax were emanating from the player’s matching Califone speaker.
 |
| Before and after photos of inside the amp |
Dialing It In
Once I got home later that evening, I suddenly realized I could hook the amp up to the console speakers to see how it sounded. I still didn’t have the Garrard changer in place, but I could send any audio source I wanted in through the amplifier’s auxiliary input. So I connected my Apt Holman preamp and proceeded to play a few of my favorite jazz LPs.
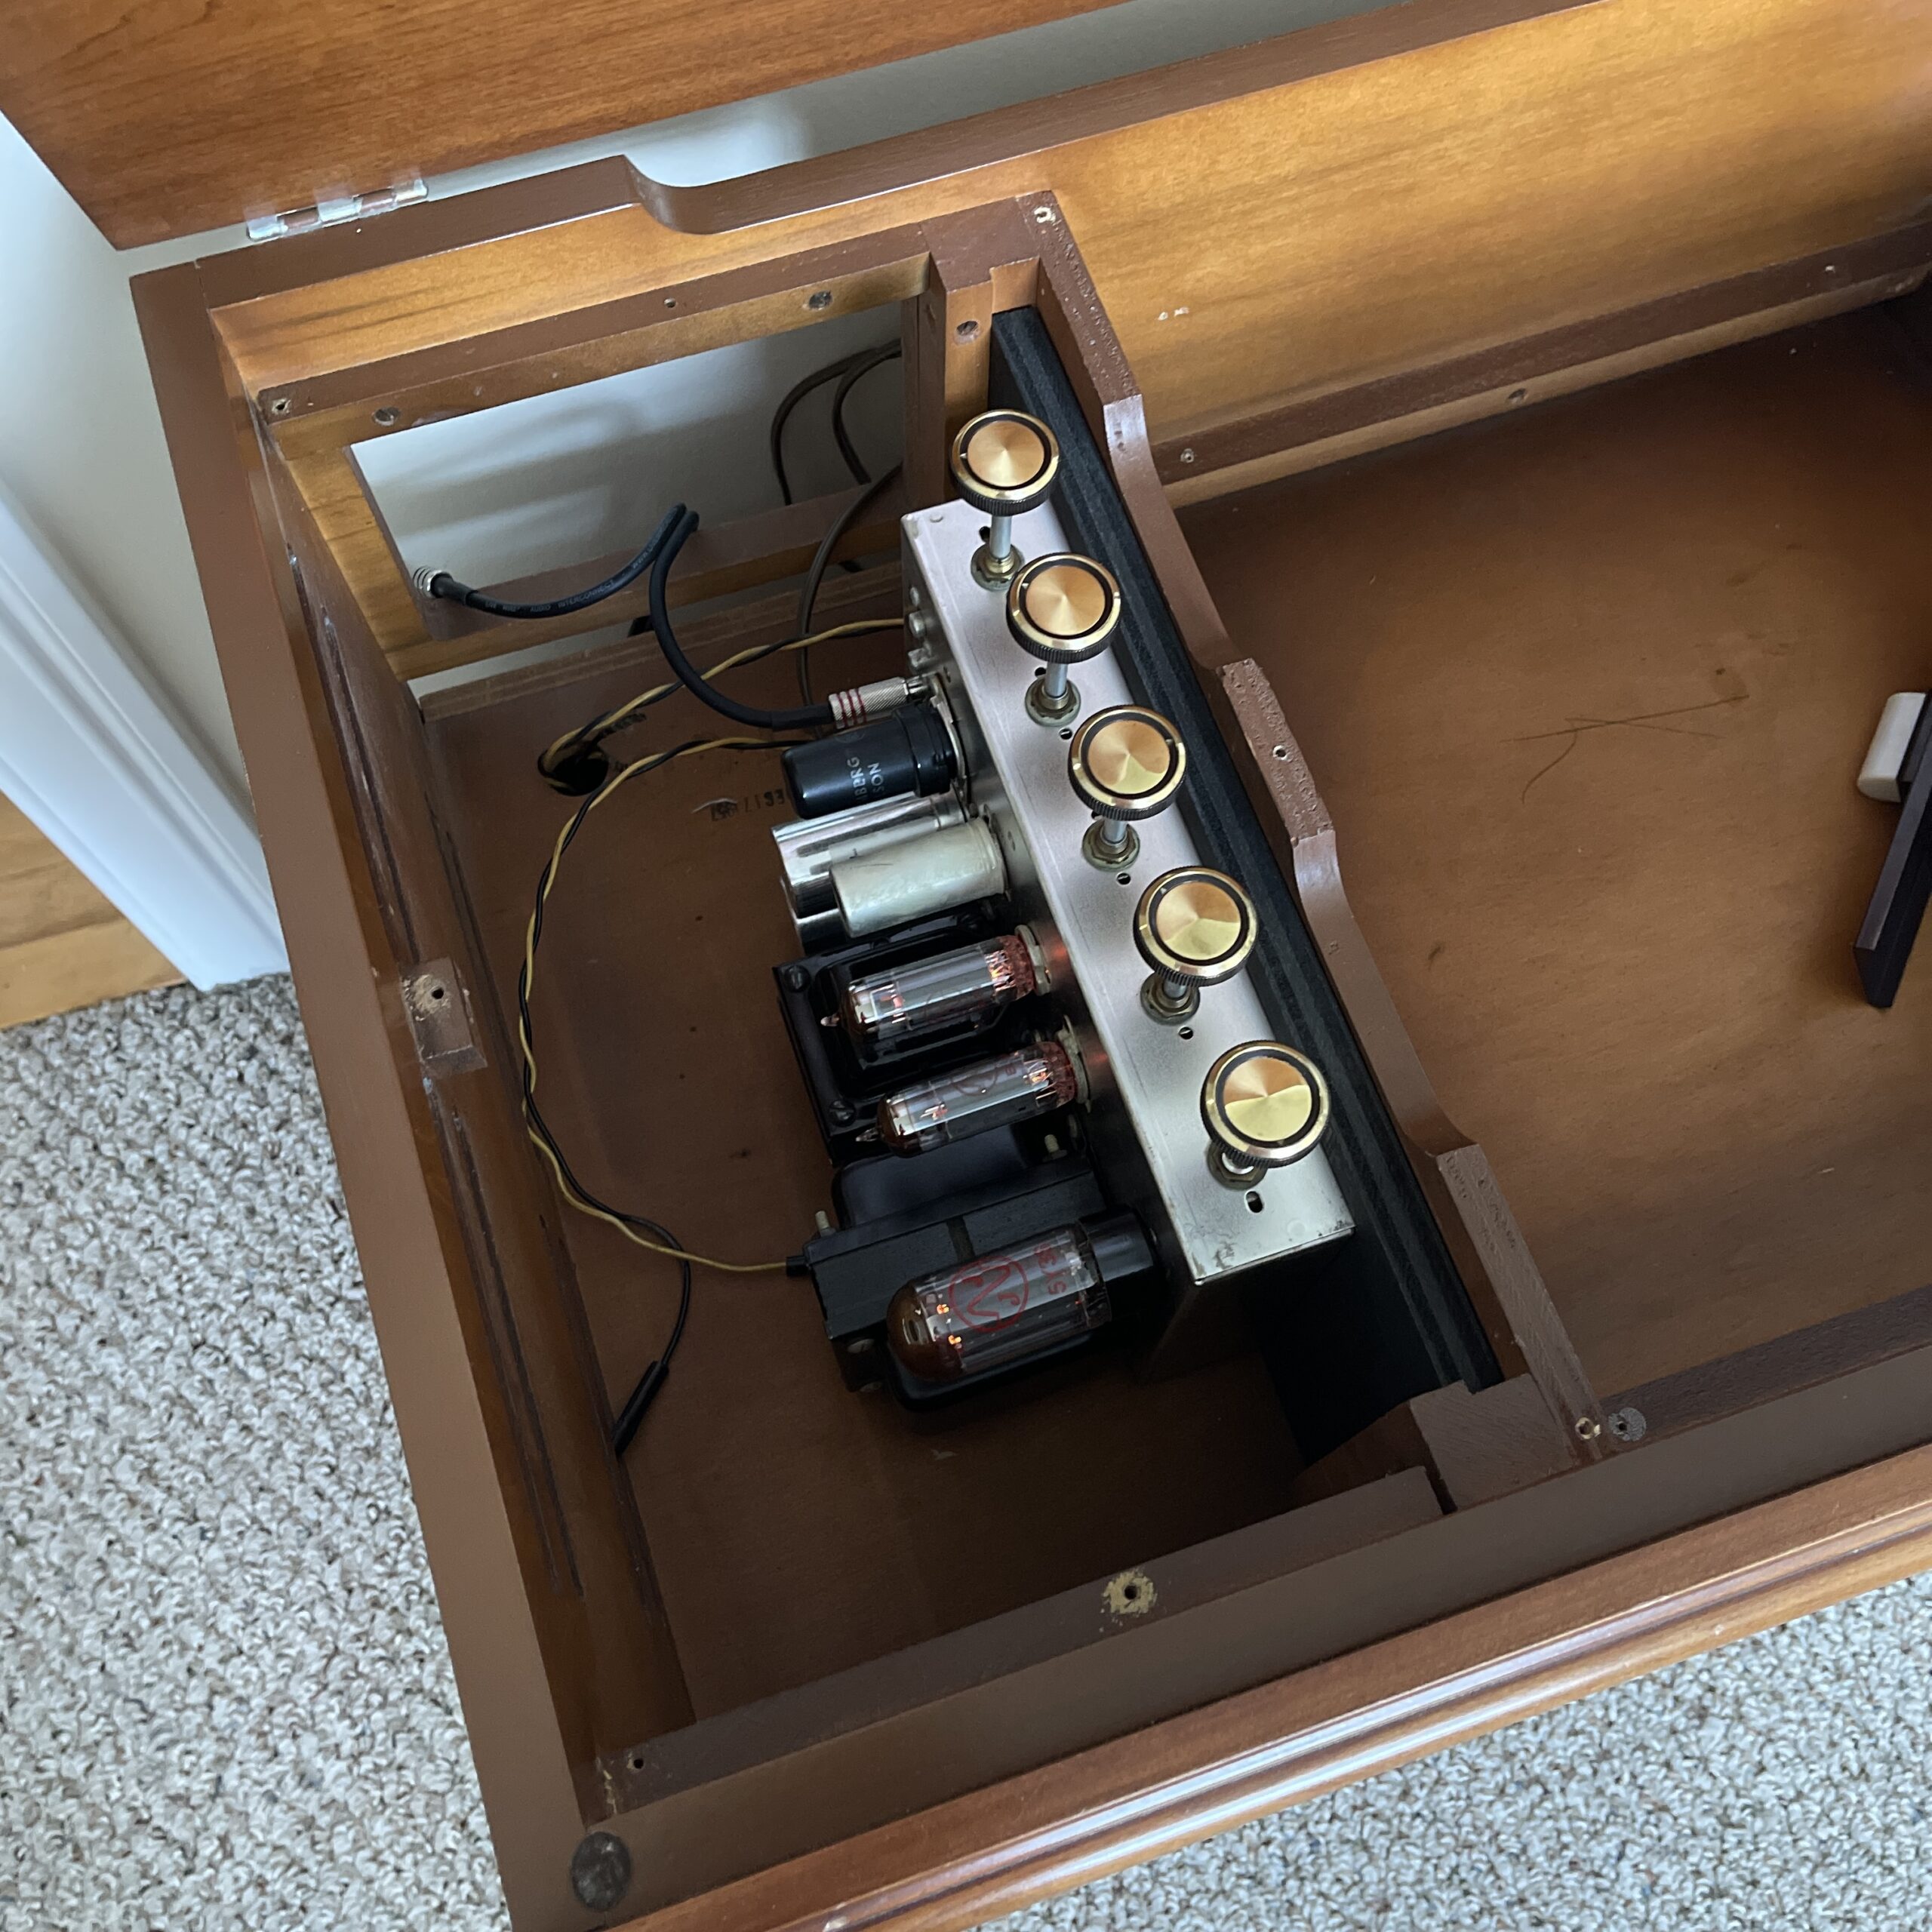 |
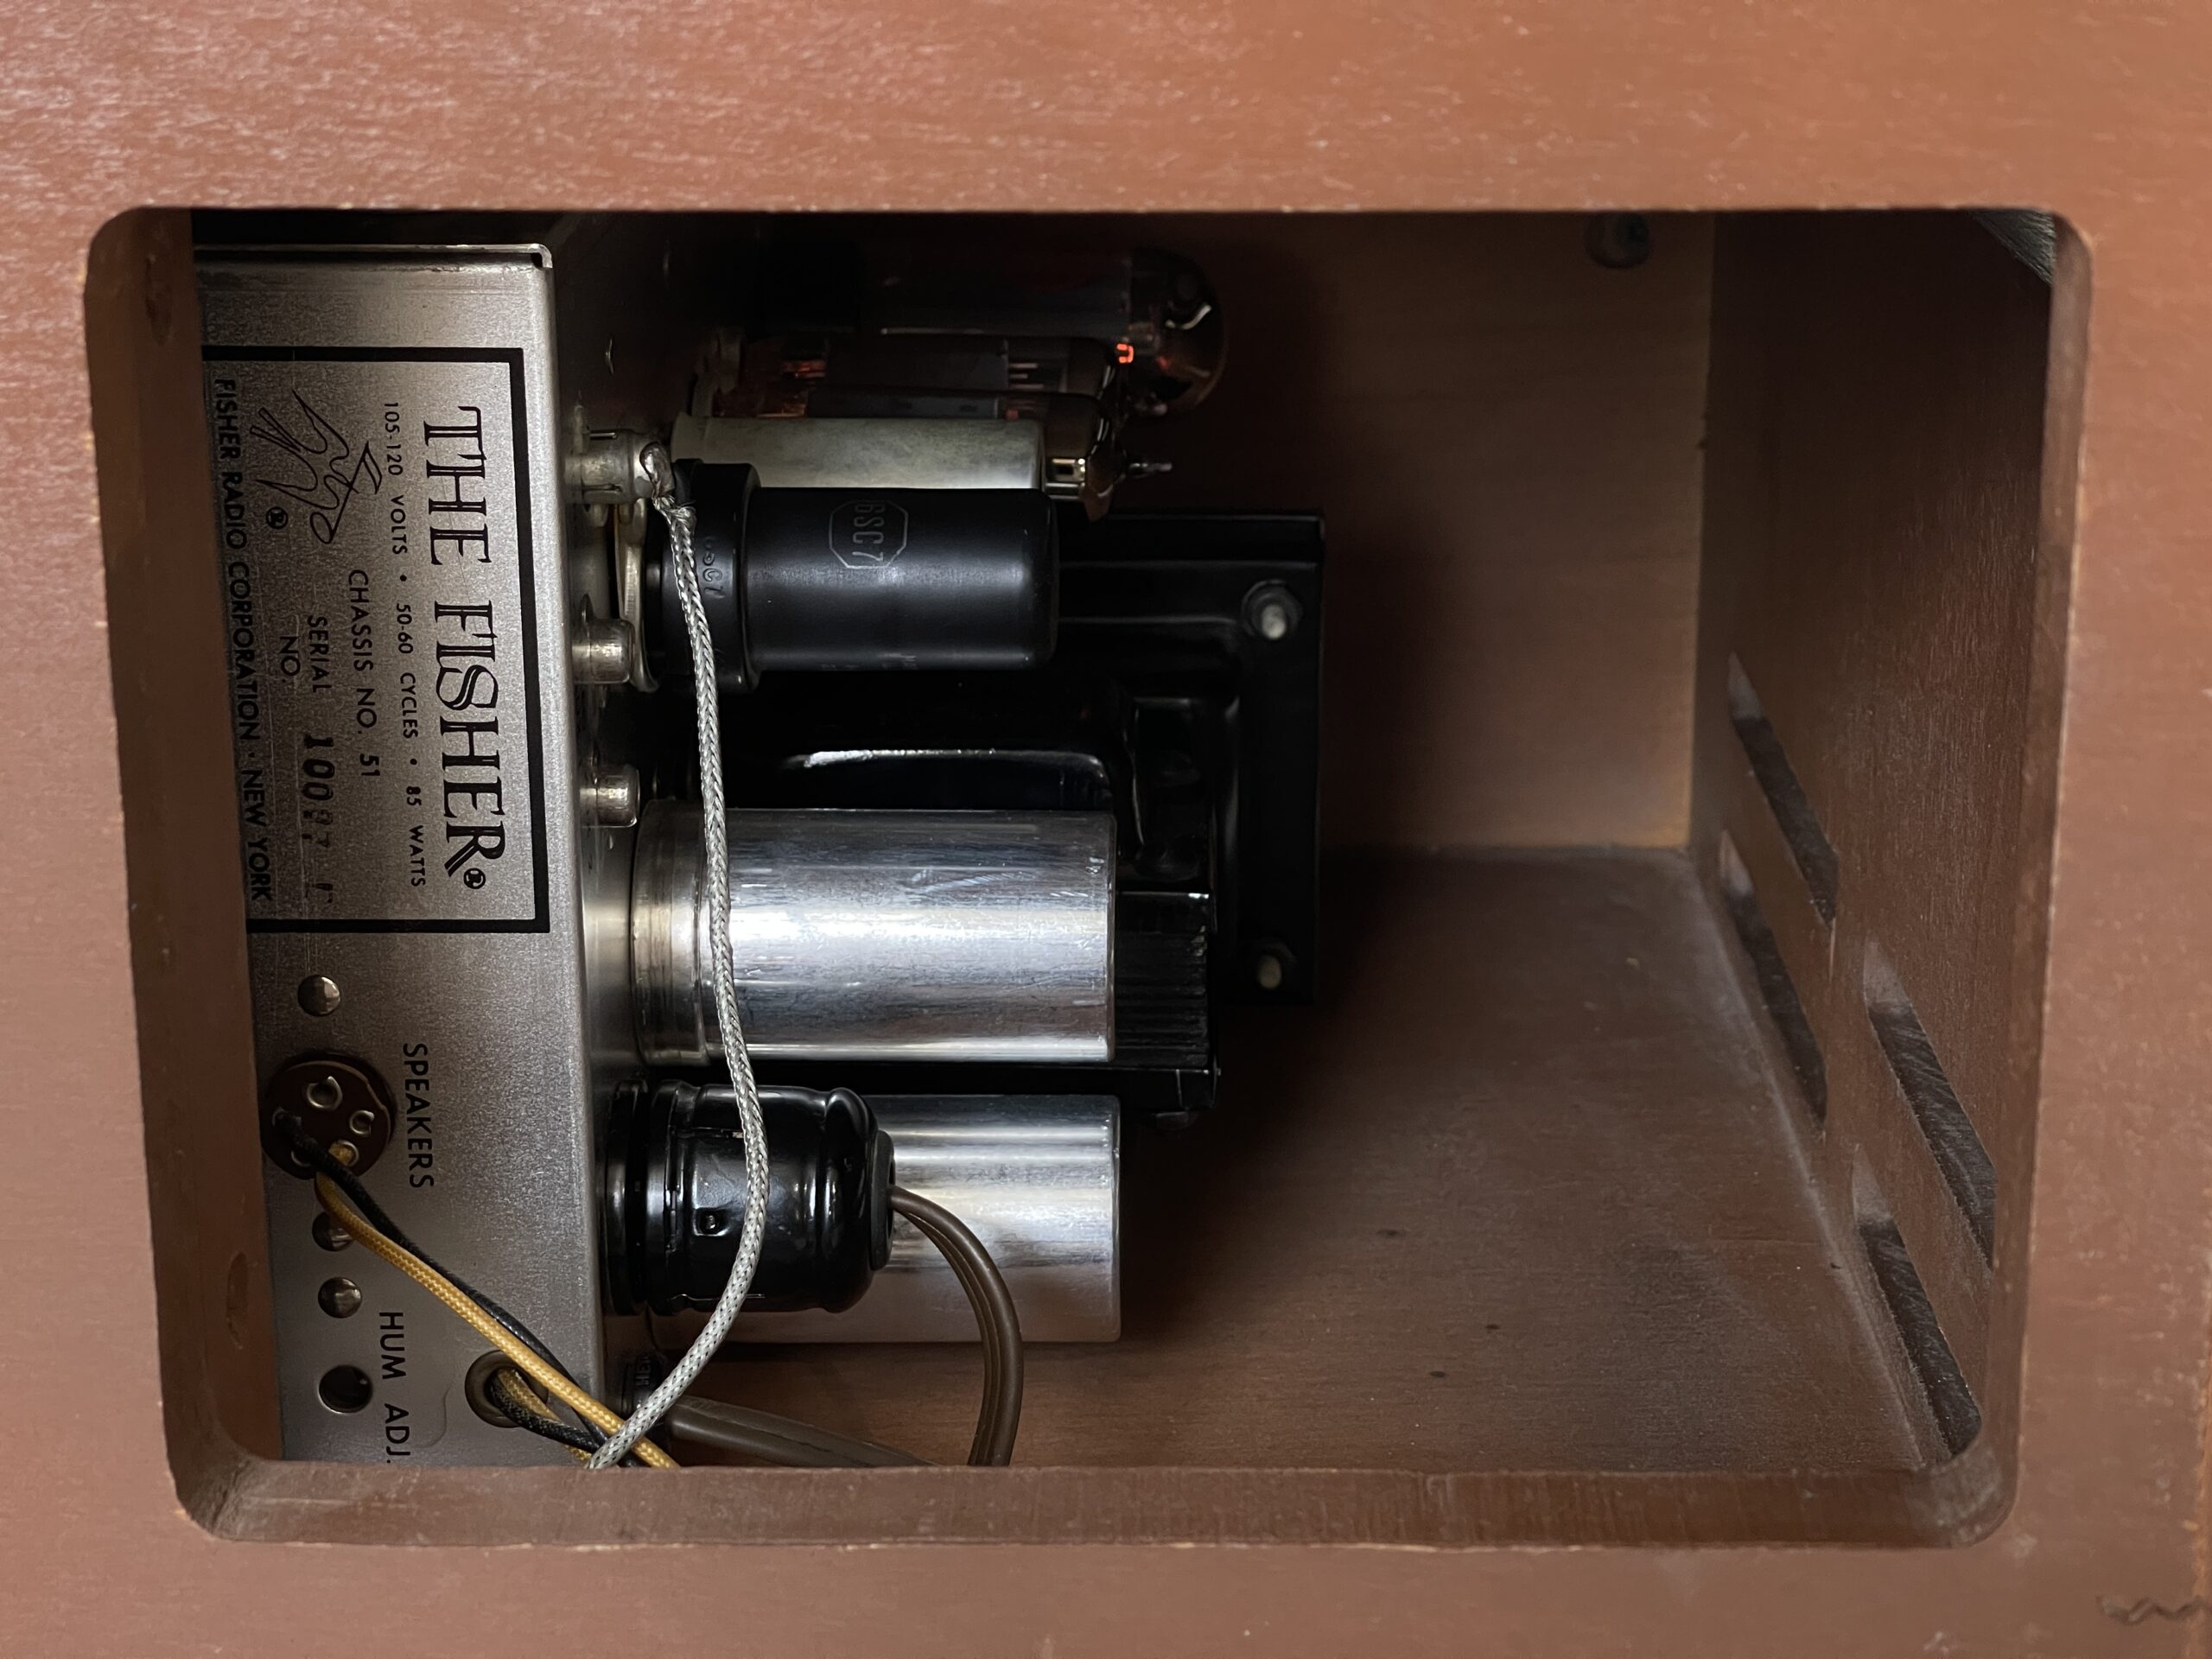
| The restored amplifier back in the cabinet |
I started with the bass and treble controls on the console at 12 o’clock (effectively “zero” — or so I thought). My first impressions: 1. The sound was loud, bold, and clear, 2. The noise floor was very low and and there was no distortion, 3. The midrange had good presence, 4. The sound was relatively dark and quite bass-heavy. Certain bass notes were really jumping out more than others, especially at louder volumes. So I turned up the treble a little and dialed back the bass a little, and that seemed to help, for the time being.
The next day I continued to play more music through the console, and the bass continued to nag me. It was becoming apparent that not only was the bass a little uneven sounding, it also sounded boomy. At first Bill encouraged me to be patient and take some time to get used to the sound, reminding me that it is a 70-year-old piece of equipment. But after a day I found myself dialing back the bass completely to get the best sound.
Replacing the Insulation
Something told me that insulation might help tame the bass, so I started doing some research. One Steve Hoffman Music Forum member explained that hi-fi consoles were notoriously boomy. They also pointed out that their enclosures were typically sealed, not ported.
I also learned about the theory of standing waves, that without proper absorption, certain low frequencies are bound to run into each other, some near-perfectly in phase and hence doubling in volume, others out of phase and reducing. A lack of insulation could also lead to resonances and ringing, which for bass frequencies is what I think translates into “boominess”.
Once I opened up the back of the cabinet, the original fiberglass insulation was sparse and looked tired. Fortunately, a friend had some spare sheepswool insulation he was willing to send me, the same insulation used in Ojas speaker enclosures.
Once the insulation arrived, I got a hold of a staple gun and installed it immediately. The original insulation was only on the bottom and one of the side walls, but I ended up treating the top, the other side, and the back of the enclosure as well. I even hung a piece in the middle of the cabinet, as Chris from Flux Condenser suggested while insulating a vintage Bozak speaker cabinet on YouTube.
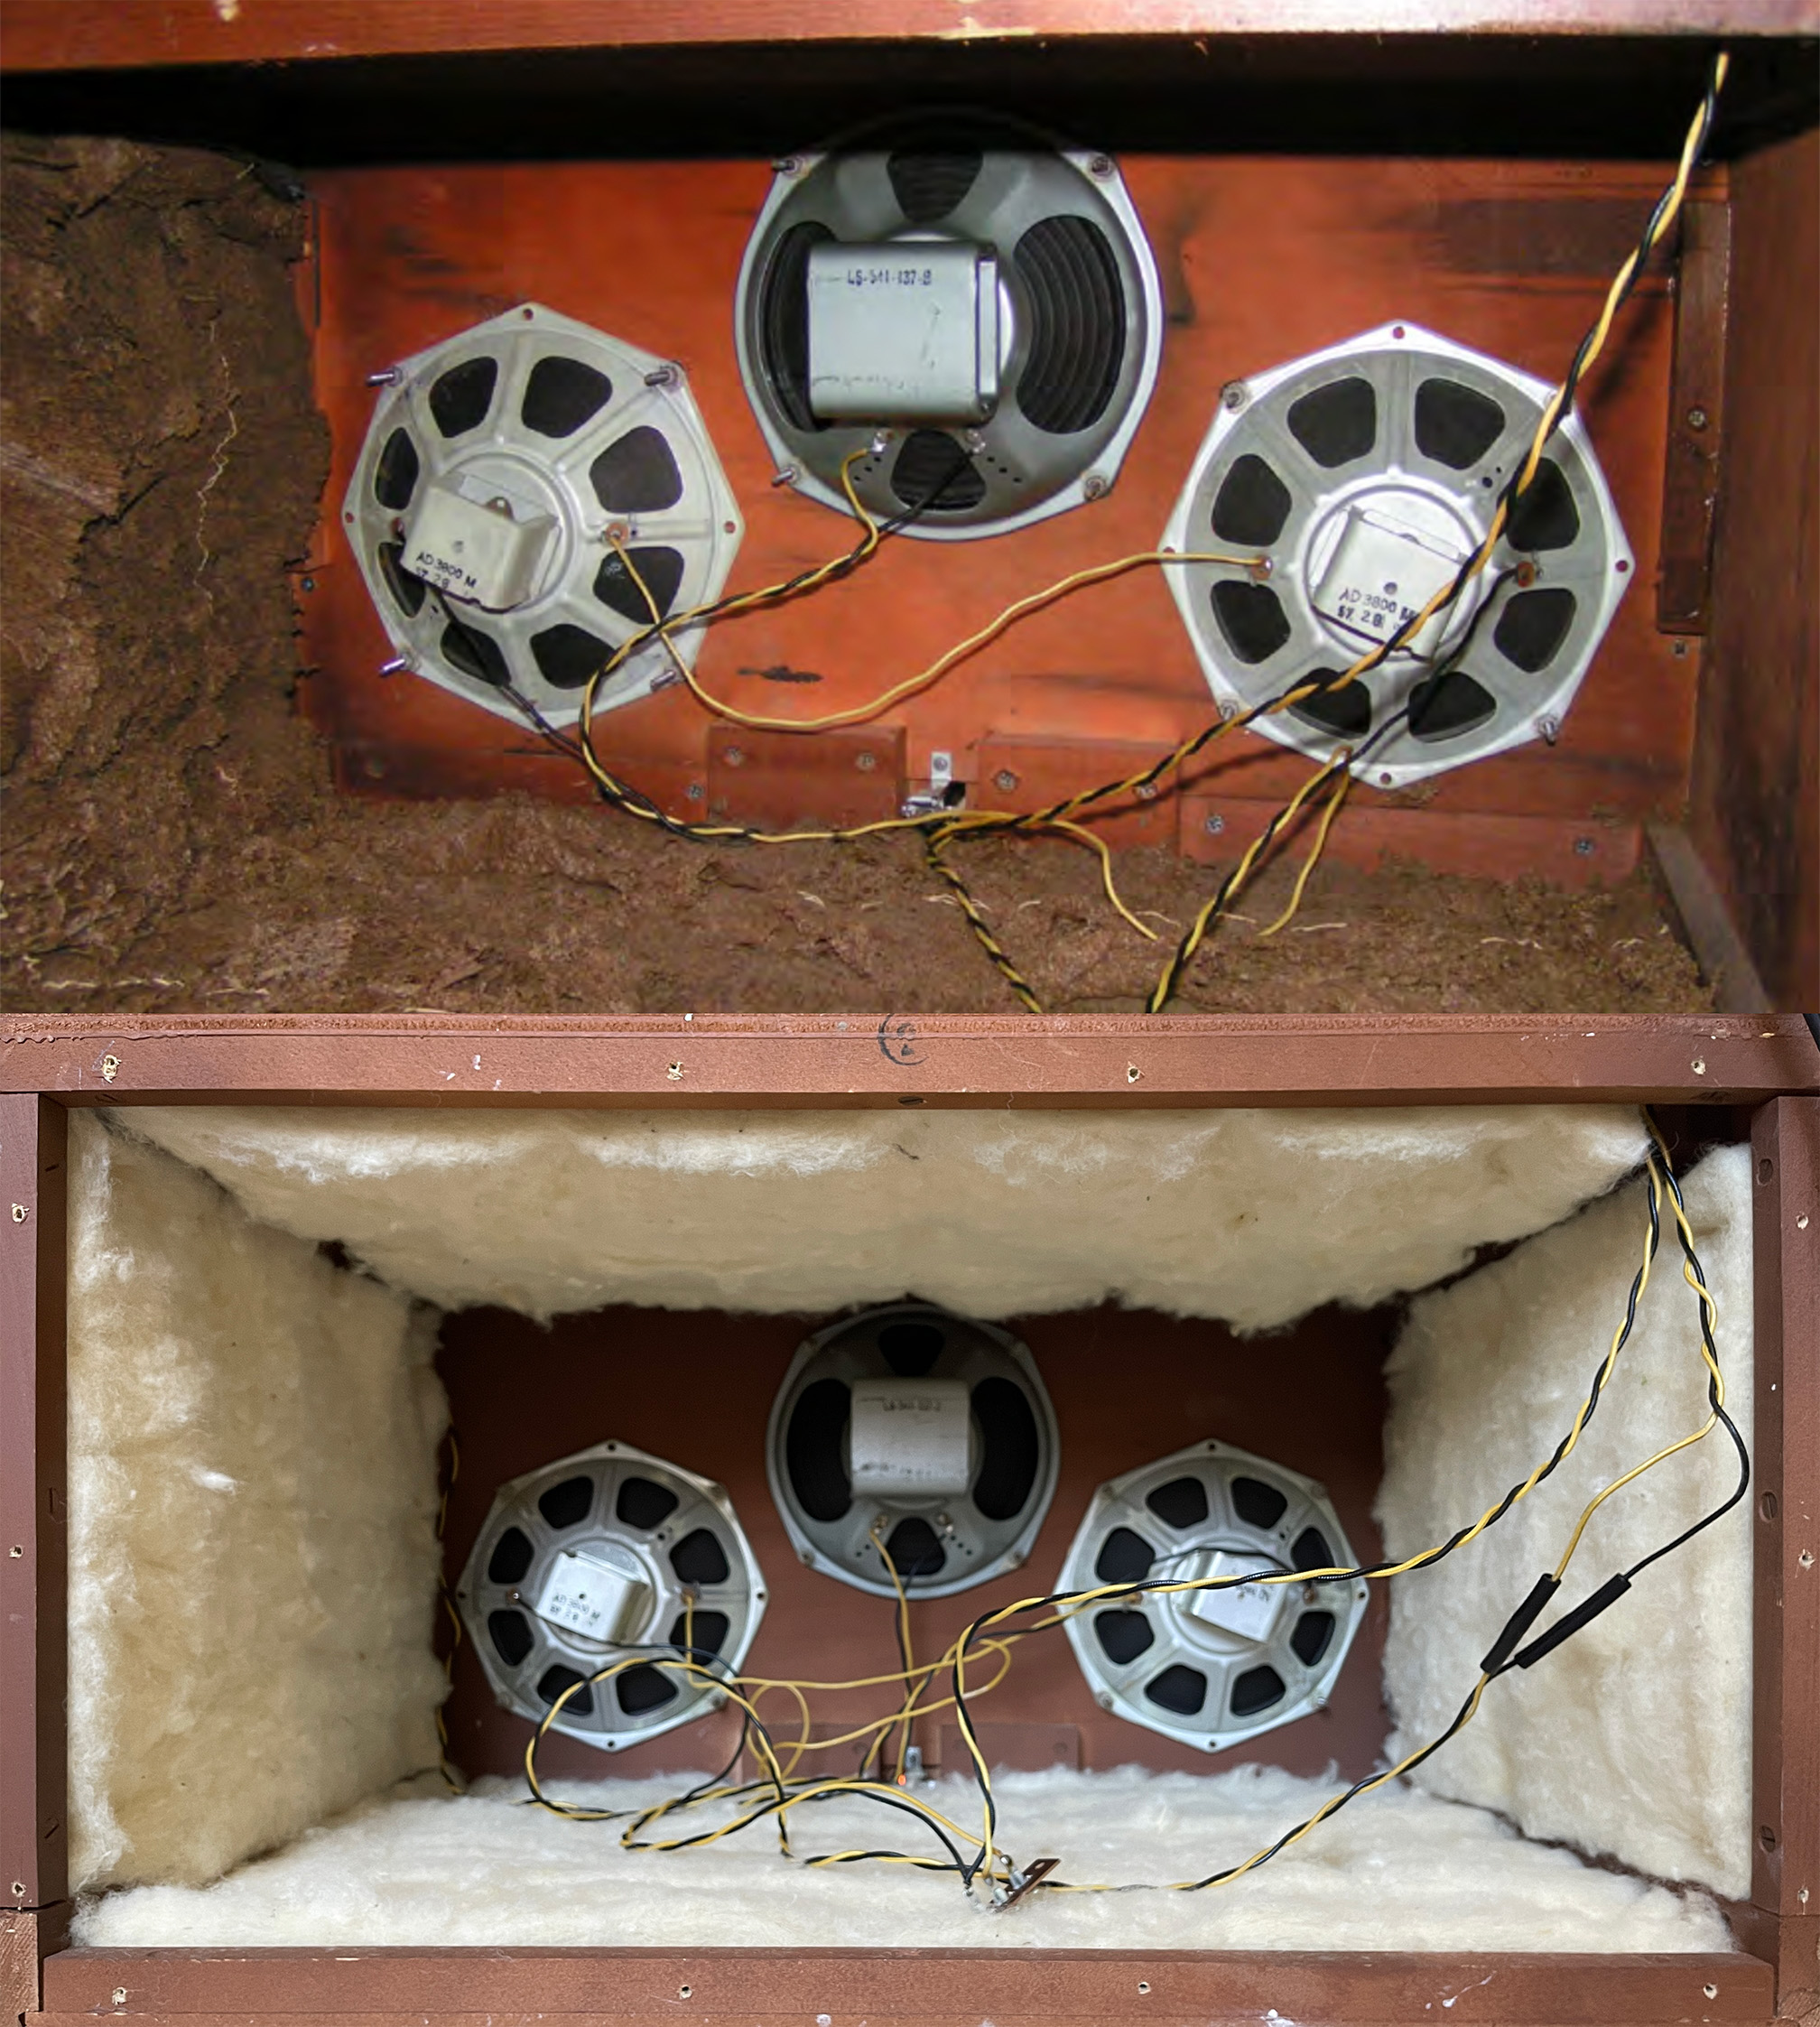 |
| Before and after photos of the speaker cabinet |
While the insulation did not make a “night and day” difference in the bass response if I’m being honest, John Pope from Greenwood Amplifiers would later explain to me that the tone control circuit for this amp is passive. This means that “flat” response ends up being achieved with the bass knob turned fully counter-clockwise — as I had been using it — and the treble knob fully clockwise. This was a relief because those settings were already sounding closer to flat to my ears. Knowing this confirmed my suspicions and also gave me creative license to use the tone controls with more extreme settings.
Restoring the Cabinet
In between trips to Bill’s I would work on cleaning the cabinet. In the very beginning of the project, I wasn’t sure if I was going to hire someone to completely refinish the cabinet, which would have included disassembling, sanding and re-staining everything. Bill’s woodworking teammate from past projects had retired, but he was kind enough to advise us on how to restore the wood on our own. He said the wood looked to be in pretty good shape as is, and all we needed to do was clean it with some Murphy’s oil soap, repair any scratches with a Tibet almond stick, and then re-finish the wood using Briwax and oooo steel wool. That sounded do-able to me, and after I had secured all the materials, I proceeded to restore the wood on my own at my apartment in Albany.
| Empty console with the amplifier and record changer removed |
There was a good amount of dust to be wiped up and removed. After applying the oil soap, I used the almond stick on the scratches. I had seen YouTube videos with people raving about how amazing these things are, and I was surprised to find that it really did kind of work like magic. There weren’t a ton of scratches and nicks on the wood, but the almond stick did a wonderful job repairing those spots. Finally, a fresh coat of clear Briwax was applied to the top and both sides, which gave the cabinet a bit more of a polished, shiny look.
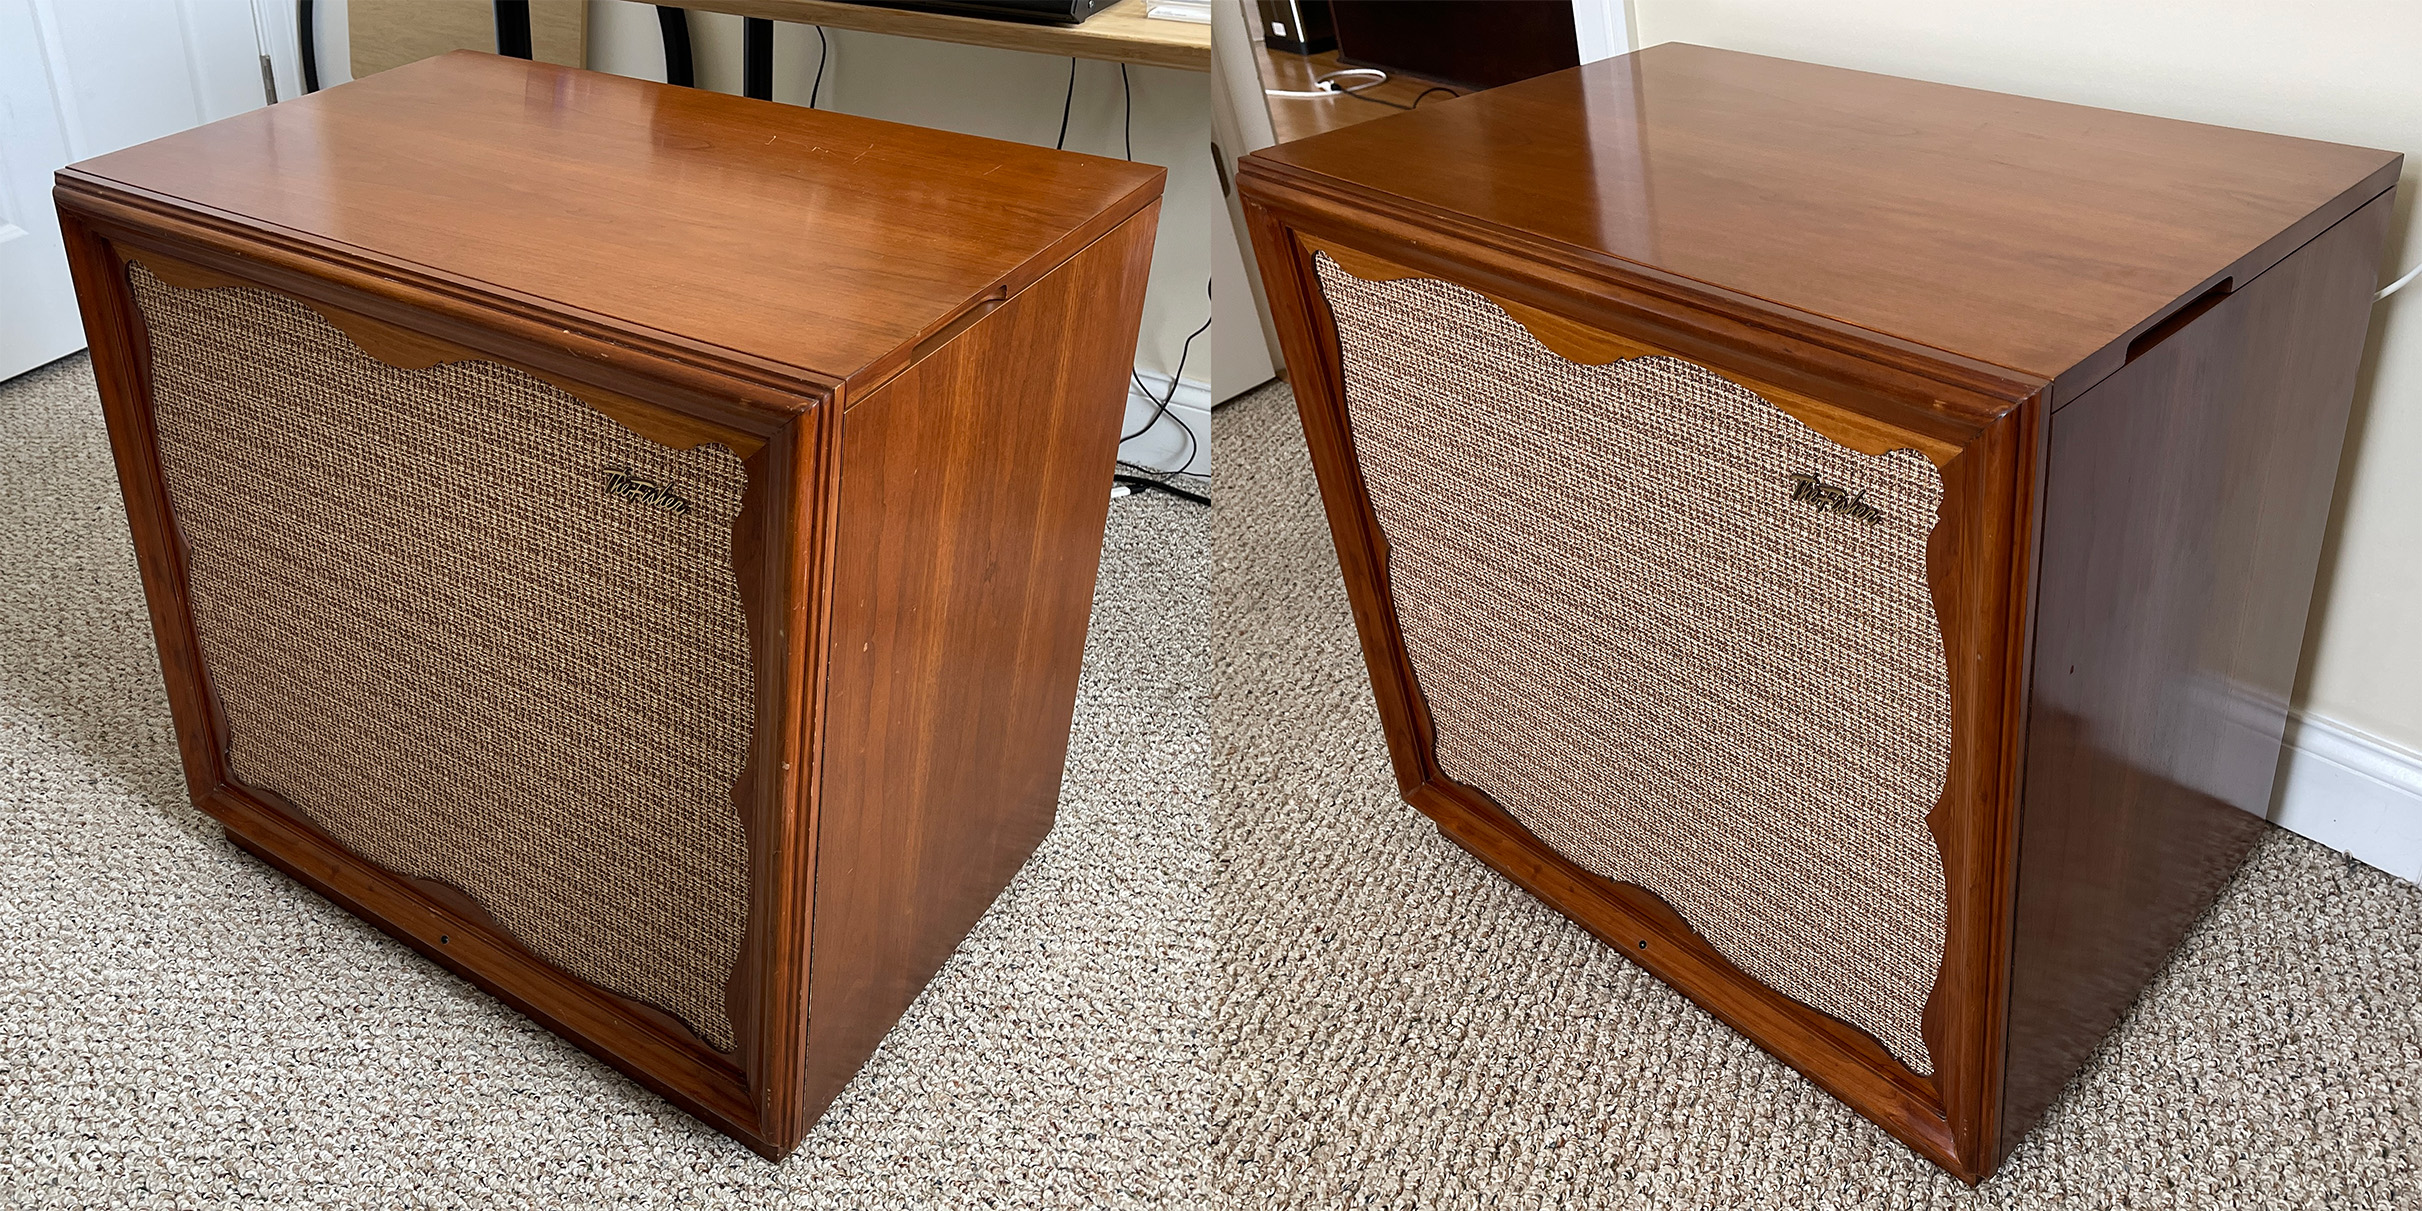 |
| Before and after photos of the cabinet |
Restoring the Record Changer
In week four we started by installing a fuse in the amplifier, then we began work on the record changer. My first assignment was to clean, clean, clean. Bill cleaned the rubber mat and platter with a toothbrush in his kitchen sink while I scrubbed the top and bottom of the chassis with a rag and Q-tips doused in either Windex or isopropyl alcohol. It was important to remove as much oxidation as possible from the metal parts on the bottom of the changer. Once everything had been wiped down, we applied a foam polish to the top of the base, which brought out an extra bit of shine.
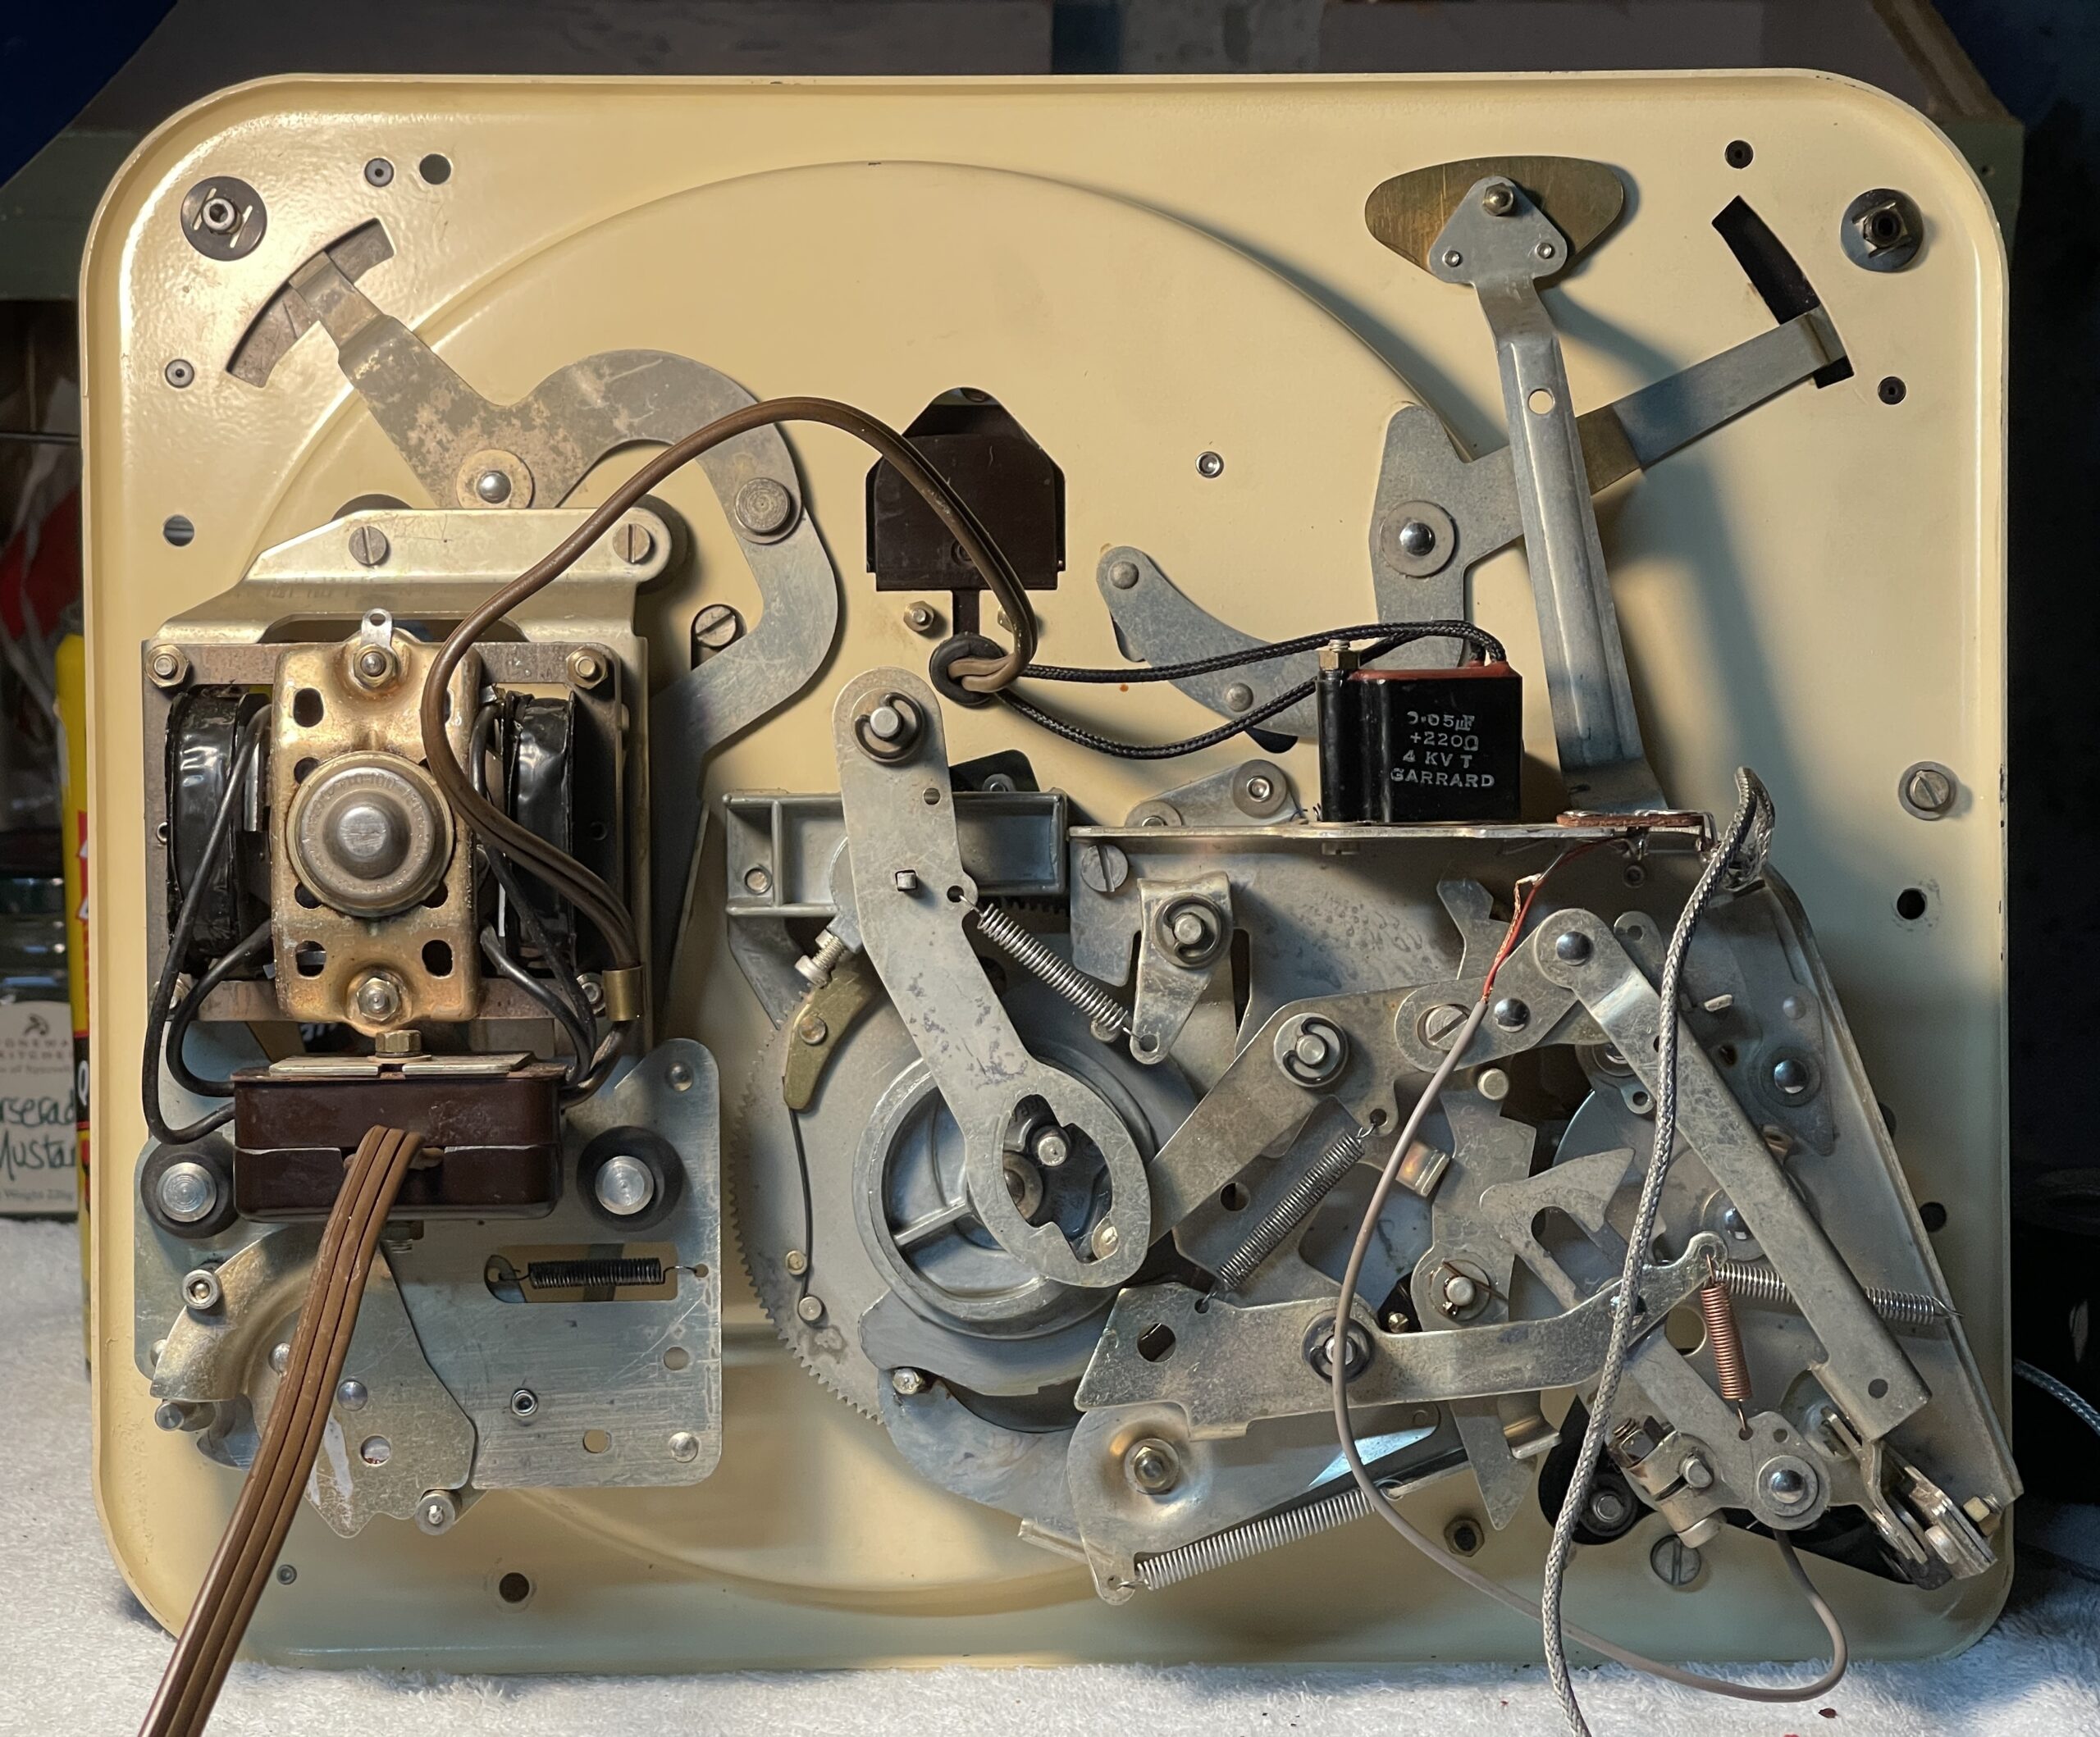 |
| Bottom of record changer after being serviced |
In our fifth and final week of work, we completely disassembled, cleaned, lubricated, and reassembled the motor. We also replaced the rubber mounts for the motor, which had dried and were cracking. After that we degreased, re-greased, and lubricated the spindle shaft and the many levers that were part of the changer mechanism. Finally, we installed the new idler wheel, and once it came time to test all the automatic features, I was again in awe of just how efficient and accurate everything worked. We then checked the tracking force and hooked the changer up to Bill’s stereo. Things were sounding great and I couldn’t wait to drive home and reunite the changer with the rest of the console.
The Finished Product
Coming back home that night, I dropped the changer back in the cabinet, hooked it up to the amplifier, and gave a listen. No doubt it was a ton of fun throwing a record on the changer and seeing such a beautiful machine’s automatic play features go to work, and with the tone controls in a more honest balance, things were sounding great.
The final verdict on the mono console experience? Very fun, very fulfilling, and hearing my favorite vintage jazz records this way just feels “right”. Bill Pauluh deserves a massive and very special thank you, as I would have never even begun to dream of taking on a project like this without his mentorship and encouragement.
Additional Images
![]()